Looks like an anniversary of the tips&tricks series! 100th tip is ON.
Quickly get full-featured color picking HUD under your cursor in Adobe Photoshop. MagicPicker HUD shows up over normal Photoshop’s interface.
The HUD is more unique, intuitive and faster than normal Photoshop panels. It always pops up under your current cursor position. It’s very important especially if you use a Wacom-like tablet (no need to move your hand anywhere). It also auto-hides if you click anywhere on the document. MagicPicker HUD can also auto-hide when you release key/button.
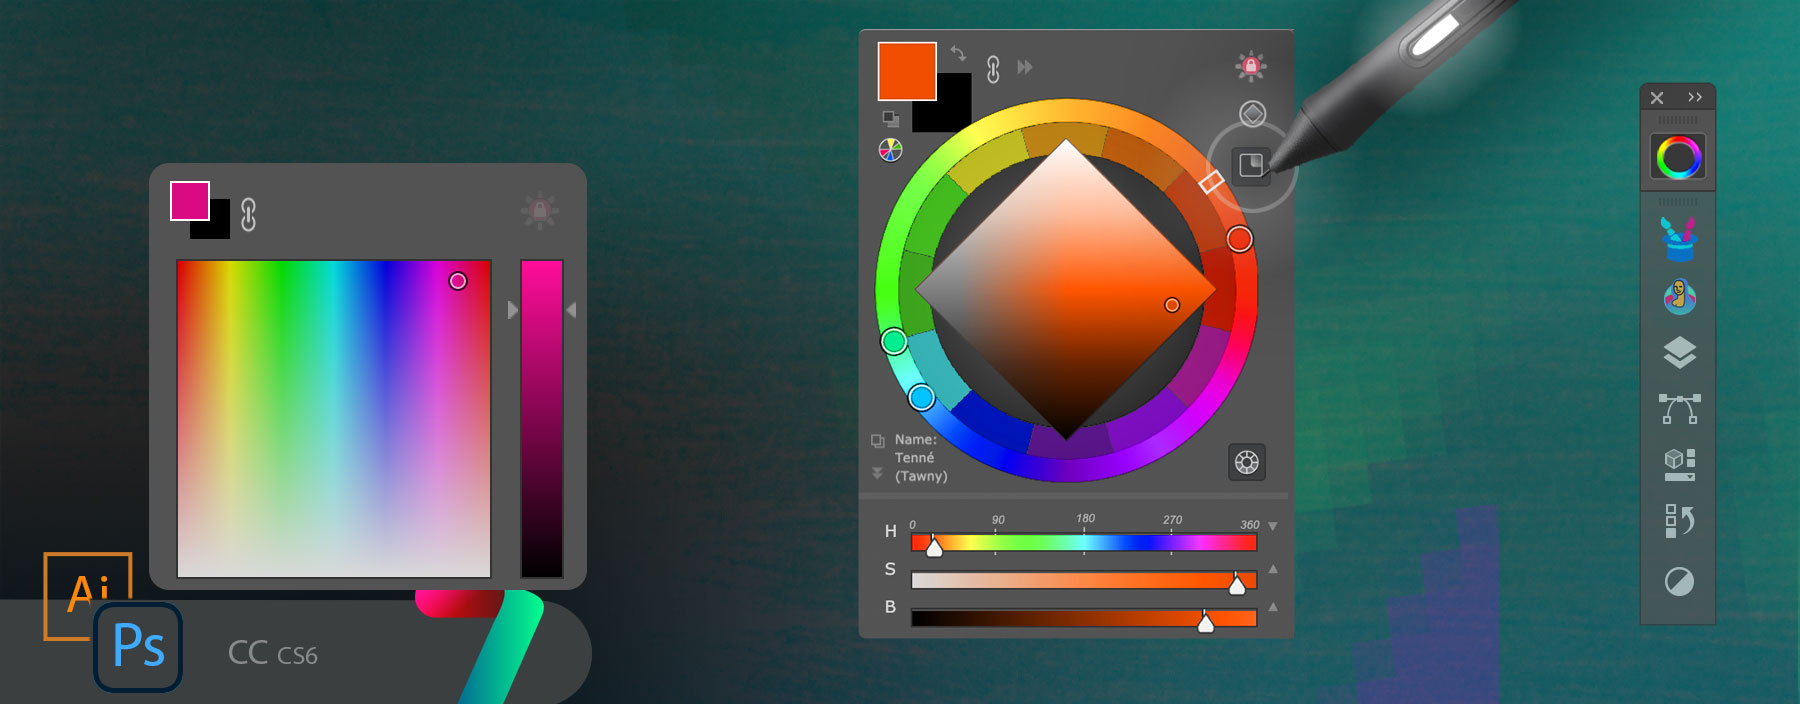
You can activate MagicPicker HUD in the following ways:
- Click “HUD” button on the panel
- Click MagicPicker menu -> HUD mode
- Assign keyboard shortcut in Settings and activate through keyboard any time
- Assign same shortcut to Stylus button and call it with stylus
- *Activate “Sticky HUD” mode from Settings to show HUD on press and hide on release of the key
HUD is available in MagicPicker starting from version 7.0.
From series of tutorials for MagicPicker, advanced color picker for Adobe Photoshop
Hi there,
I have a question about the tone locker feature built in Magic Picker which was the primary reason I made the purchase. I noticed when I use the tone locker with wacom tablet, the result often showed inconsistent gamma values. This was viewed by converting the image to B&W and it’s obvious certain colors were either brighter or darker than the others. Conversely, if I use mouse, it produced very consistent gamma throughout. Is there a reason why this happened? I am using Photoshop 2021 and Magic Picker 7.2. Thanks.
Cheers,
Alan
Sorry about your experience! Can you please explain in more detail what goes wrong? Screenshots would really help! Please ping https://anastasiy.com/support or email us at hi@