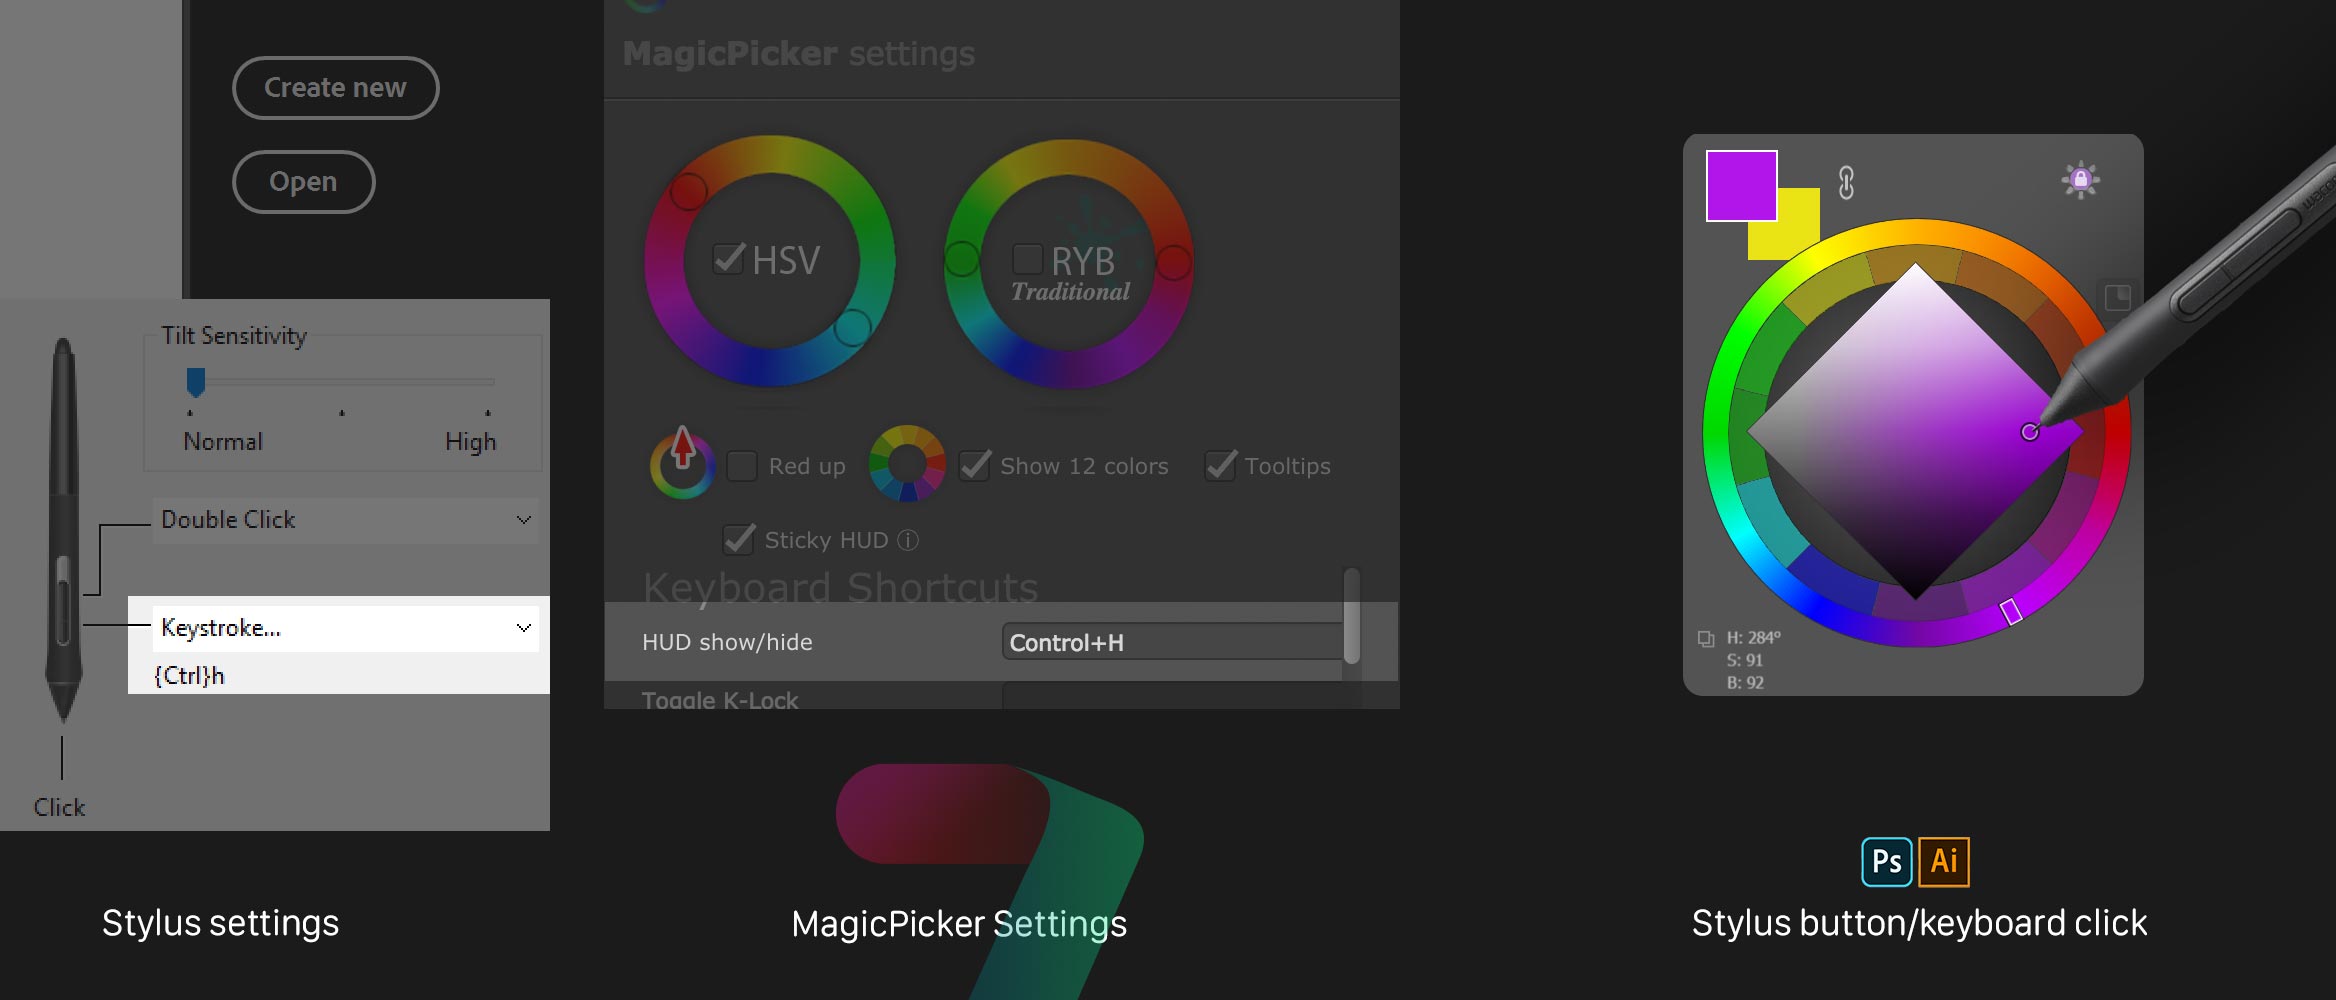
“Sticky HUD” is the new quick mode of display of the panel since MagicPicker 7.1.
In this mode the panel “sticks” to the HUD Keyboard Shortcut. When you press the shortcut it will show the panel and you release the keyboard to hide it.
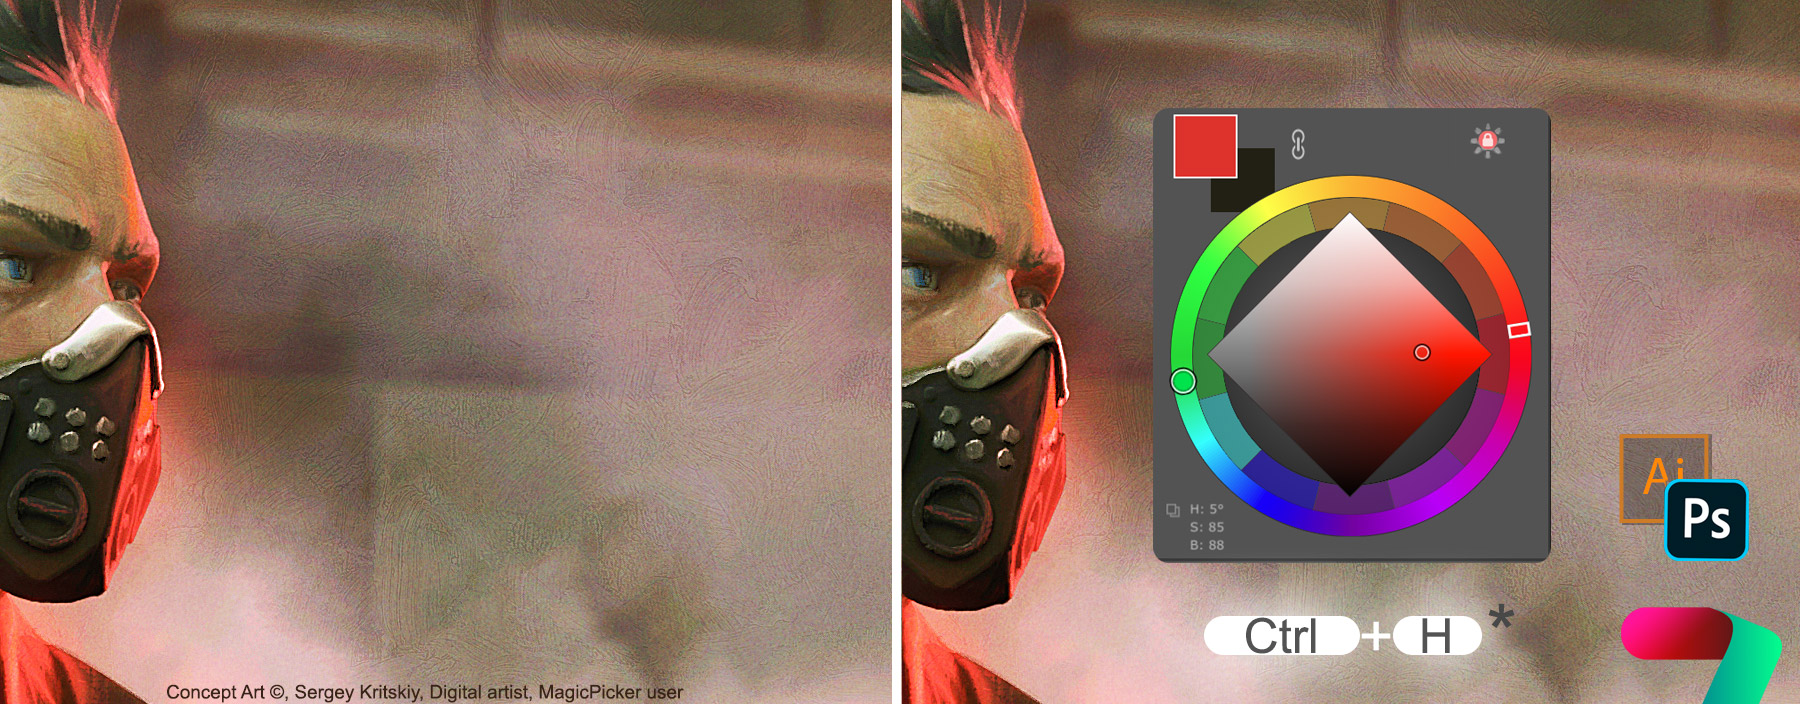
Sticky Color Wheel HUD in MagicPicker – activated with Ctrl+H (configured from Settings)
This allows you to choose the colors really quickly – the panel pops up at your current cursor position on the screen.
Activate Sticky HUD mode from Settings
This mode is especially useful when using Wacom/Tablet Stylus pen. You can bind Pen’s side button to the same shortcut, so when you quickly press the Pen button it hides the HUD and you release the stylus button to immediately hide it.
*NOTICE: on macOS please downgrade Wacom driver to ver6.3.37-3 to use this feature.
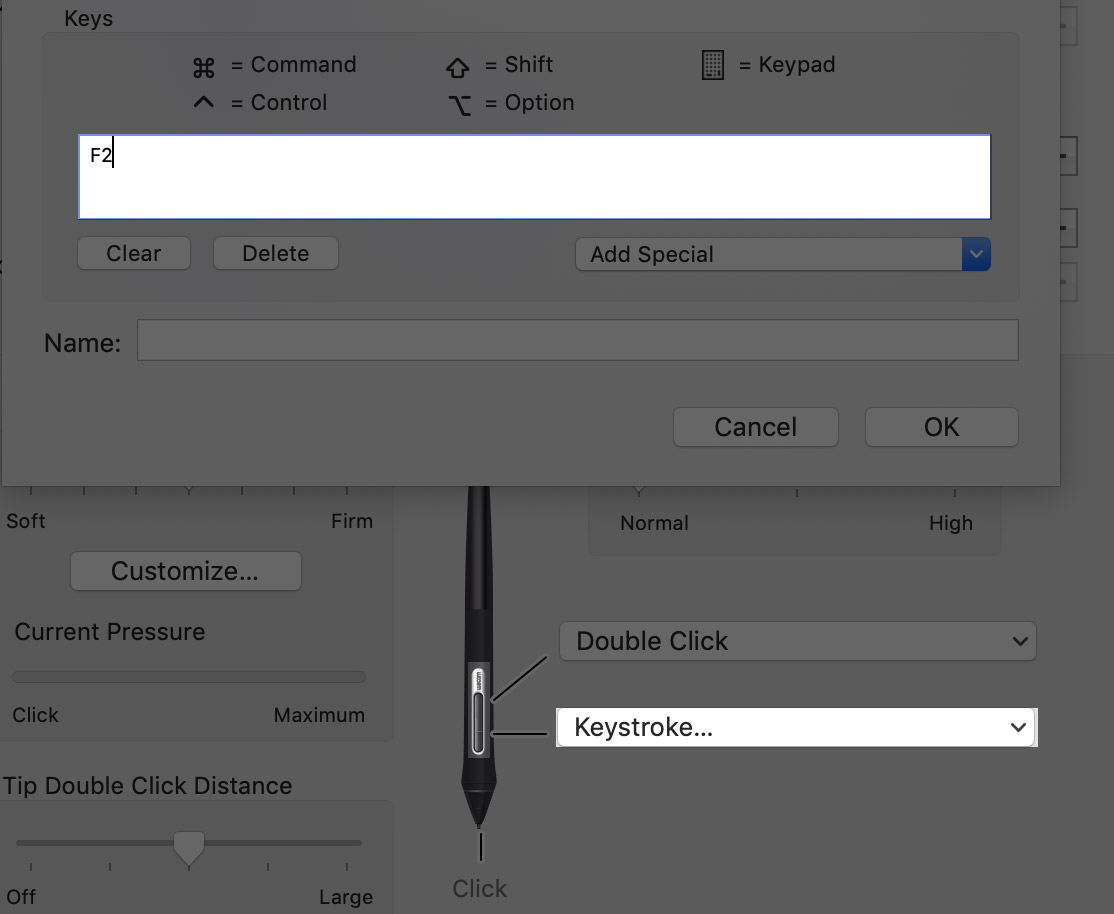
Bind same Keyboard Shortcut to Stylus button (Wacom Tablet Settings on macOS)
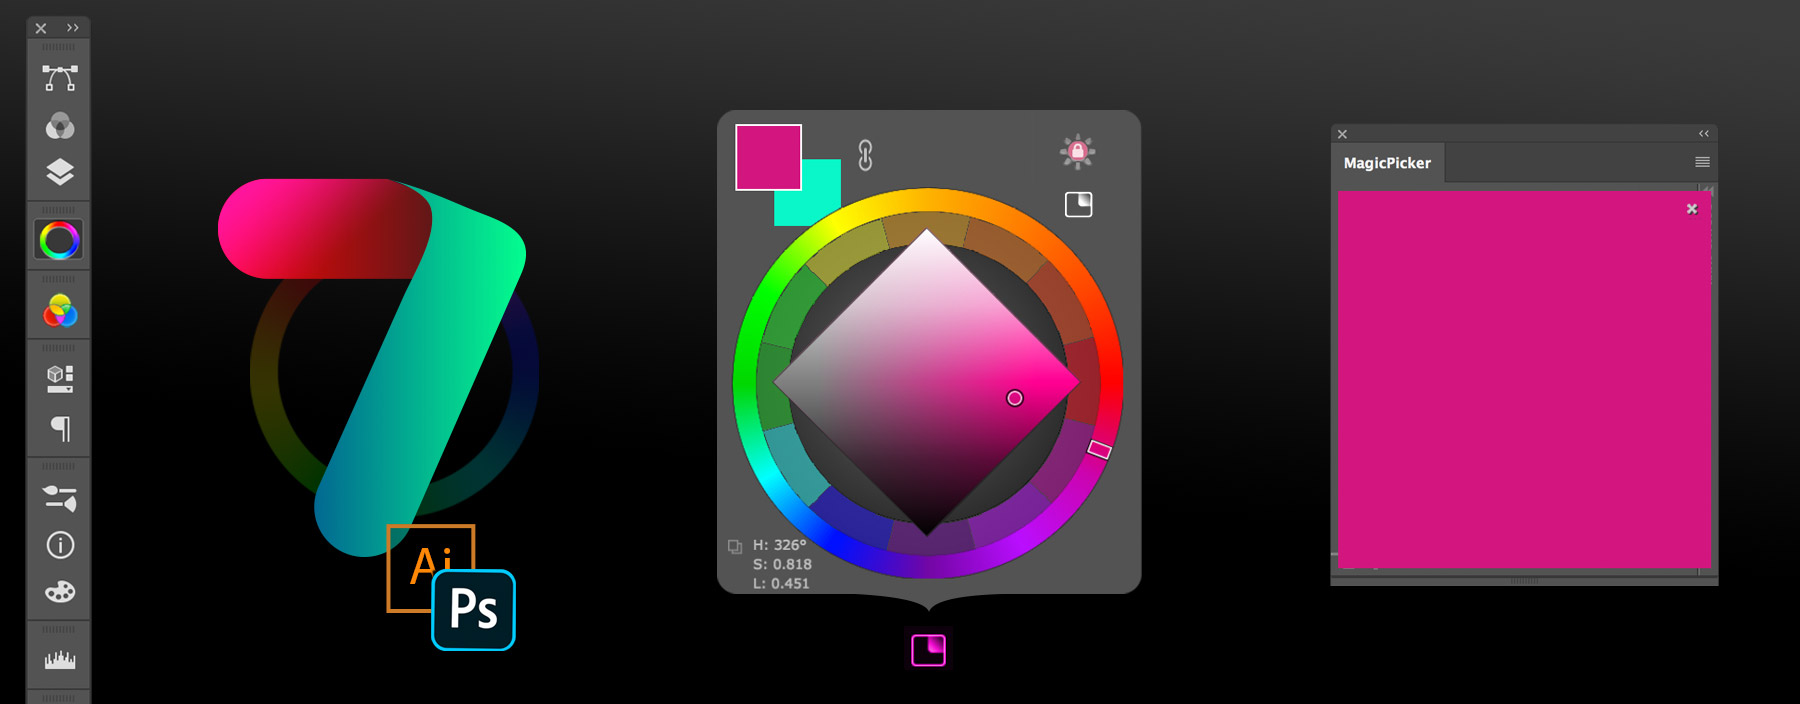
New MagicPicker 7 HUD pops up under cursor, and more than 25 improvements
WHAT’S NEW
NEW! HUD Mode! Popup MagicPicker anywhere on the screen under your cursor.
– Displayed via a keyboard shortcut (defined in Settings)
– Displayed via a stylus button click (if button click is assigned to that shortcut)
– Displayed by clicking “HUD Mode” button on the panel
– Works in Photoshop AND Illustrator
– Interactive and fully functional HUD! All MagicPicker functions work including Color Scheme switch etc
– When in HUD Mode all keyboard shortcuts work without running MagicPicker from Extensions menu Read how to assign keyboard or stylus shortcut to MagicPicker HUD
NEW! Color values on the wheel are now displayed in real time as you move your mouse/stylus
– So you can see what are you picking right away
NEW! New Keyboard Shortcuts to new MagicPicker functions:
* Swap current color for its complementary
* Swap current color for its complementary keeping color’s brightness (Tone Lock’ed)
NEW! MagicPicker now affects Solid fill color of selected layer when Colorize Shapes and Text is on.
– It can shift hue in multiple selected colored fills if multiple layers are activated and
hue on the color wheel is shifted
NEW! Snap color to the 10’s on the ruler
– Also Ctrl- or Cmd-click HSB or RGB sliders to round to the closest of 10, 20, 30 etc
NEW! Full size preview of the current color!
– ALT-clicking on the foreground/background color swatch brings huge color preview the size of the whole panel
NEW! Auto-copy current color values to Clipboard. You pick a color and its values are automatically in the clipboard
– Ctrl- or Cmd-click on the Copy values button to activate it
– New updated and speeded up modern UI framework, that supports all modern GPU features
– MagicPicker 7 is again the fastest color wheel in your environment!
– Optimized for better power management on laptops, Surface devices and MacBooks
– Optimized to run on older computers
– Still supports Adobe CS4, CS5, CS5.5 and CS6 (also CC, CC2014, CC2015, CC2017, CC2019, CC2020+)
– Optimized to support latest Photoshop 2020 (Illustrator too)
– Tone Lock supports new color spaces
– HUD Mode supports OpenGL and Metal GPU acceleration (if present) for instant color picking via a popup
– HUD Mode can be activated via shortcut without running MagicPicker from Photoshop menu
– Better support of Surface Book and Surface Pro
– Better support of non-Wacom tablets
– Improved Shift behavior on color wheel for changing colors slightly
– More Keyboard Shortcuts
– New Keyboard Shortcuts smartly support traditional color wheel mode when it’s active
– More than 25 keyboard shortcuts for faster and more handy color adjustment
– HUD mode supports PRO mode features
– Improved UI performance in different scenarios
– Fixed various minor UI problems
– Improved loading speed, especially in new HUD mode
– Compact Mode is still supported together with HUD
– Optimized to work with macOS Catalina, new Windows 10 updates
– Correctly works with XDR and HDR displays (on OpenGL supported GPUs)
– All improvements implemented by real-life users’ feedback
New MagicPicker 7 is out, so you can now use it as a fully featured professional HUD popup for picking colors in Adobe Photoshop and Illustrator.
*HUD is displayed exactly where you look at – under the cursor, so you don’t get distracted from your art.
MagicPicker Color Wheel HUD popup setup in Photoshop and Illustrator (Keyboard and Stylus settings)
Setting it up is really easy and quick!
1) Go to MagicPicker Settings and assign any keyboard shortcut to the HUD Mode. Even the simplest like Ctrl+H would work!
2*) If you want to display it when clicking a Stylus (Wacom or any other) button – just assign the same keyboard shortcut in its settings
3) That’s it! Now you click a button and MagicPicker will be available any time under your cursor.
This feature will work in Illustrator and Photoshop 2020, CC2019, CC2018, CC2017, CC2015 and CC2014.
Main features of the HUD:
– You can assign any keyboard shortcut to it
– It’s resizable – can be small or big, exactly what you want it to be
– Quickly hides by clicking outside
– All functions of MagicPicker work including uncluttered PRO Mode
– It’s fast and powered up by OpenGL/Metal
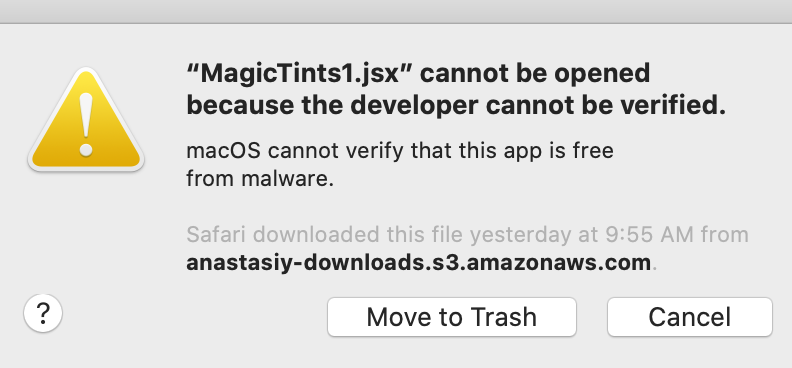
If you have updated to macOS 10.15+ Catalina (or higher – El Capitan, Big Sur or Monterey etc.) you may have noticed that MagicTints panel stopped working in Adobe Photoshop CC, Illustrator CC or InDesign CC. You cannot apply color correction and match colors between layers. Some users reported errors like “MagicTints1.jsx cannot be opened because developer cannot be verified” and “Could not color match the following layers…”.
Don’t worry, there’s a fix for that! Please do the following (see below):
MagicTints macOS Catalina error (fixed)
 1) Download MagicTints Catalina fix script

 2) Open Adobe Photoshop CC and choose File -> Scripts -> Browse and locate MagicTintsCatalinaFix.jsx you just downloaded

 3) That's it! Enjoy MagicTints
Please note that I don’t recommend to update to macOS Catalina yet as Photoshop itself may act strangely, there are problems with UI Scaling and other plugins. Hopefully Apple and Adobe would provide a fix soon. We will also publish the new update MagicTints that doesn’t require any additional scripts to run.
Keep relationship between foreground and background colors when using eyedropper. In Photoshop click Link button next to color swatches on MagicPicker color wheel panel and then use eyedropper.
Keep linked background to foreground w/eyedropper in MagicPicker color wheel
Background color will update automatically. So for example you can always have complementary color in the background swatch.
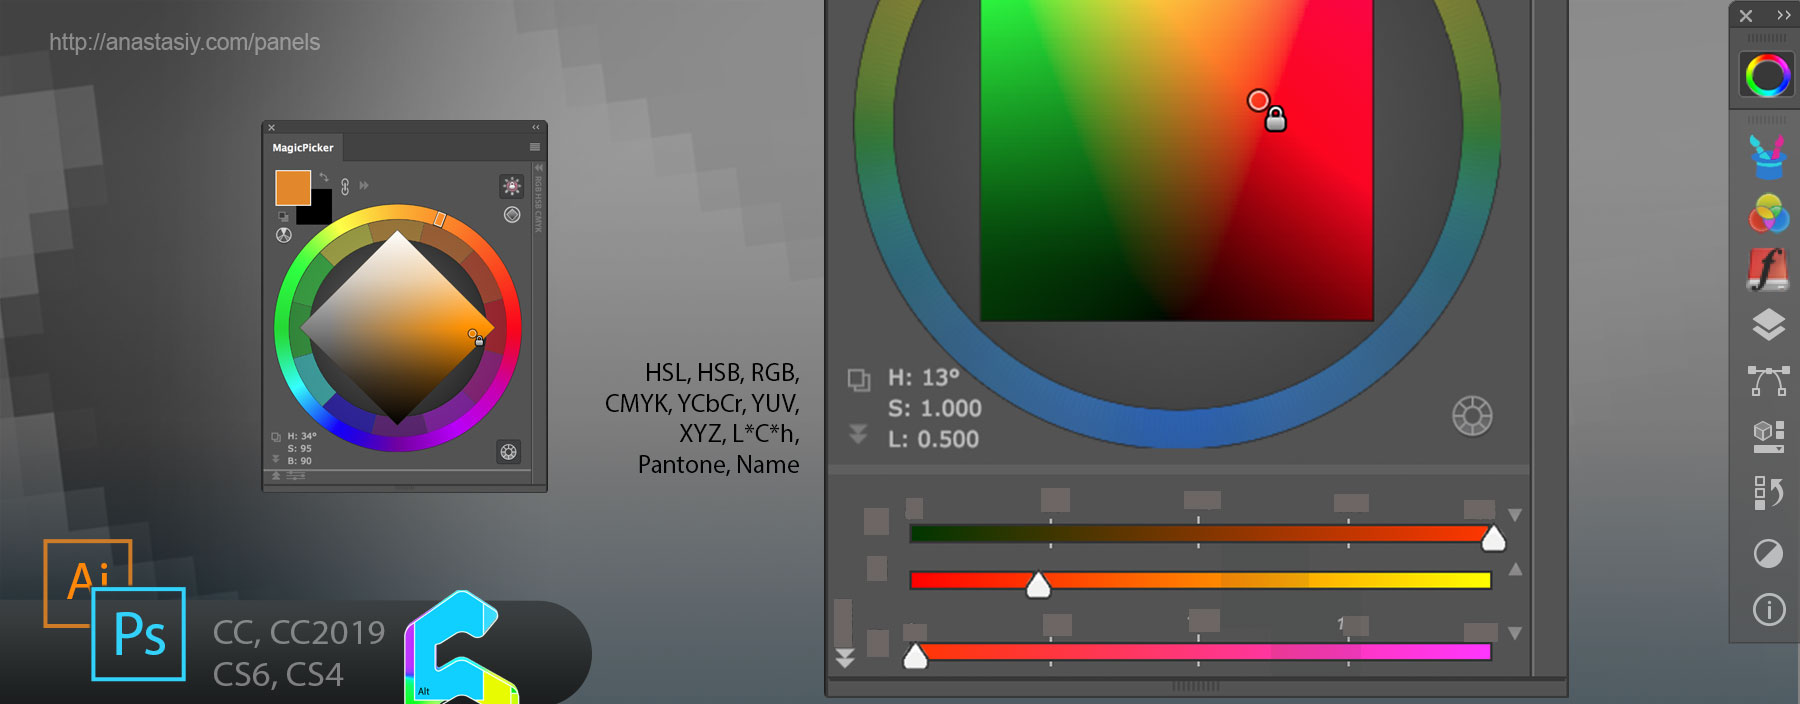
You can use MagicPicker panel in Photoshop to quickly get HSL, Pantone, YCbCr, YUV, XYZ, L*C*h or color name and copy to clipboard.
Convert HSB to HSL (YUV, XYZ, CMYK, Pantone etc) with one click
Use expandable field on the left bottom of the panel to see color values. Click on the field to switch between color spaces. Click on the Copy button to copy color values to clipboard.
MagicPicker is a professional Photoshop color wheel picker for CS4, CS5, CS6, CC, CC2014, CC2015, CC2017, CC2018, CC2019+
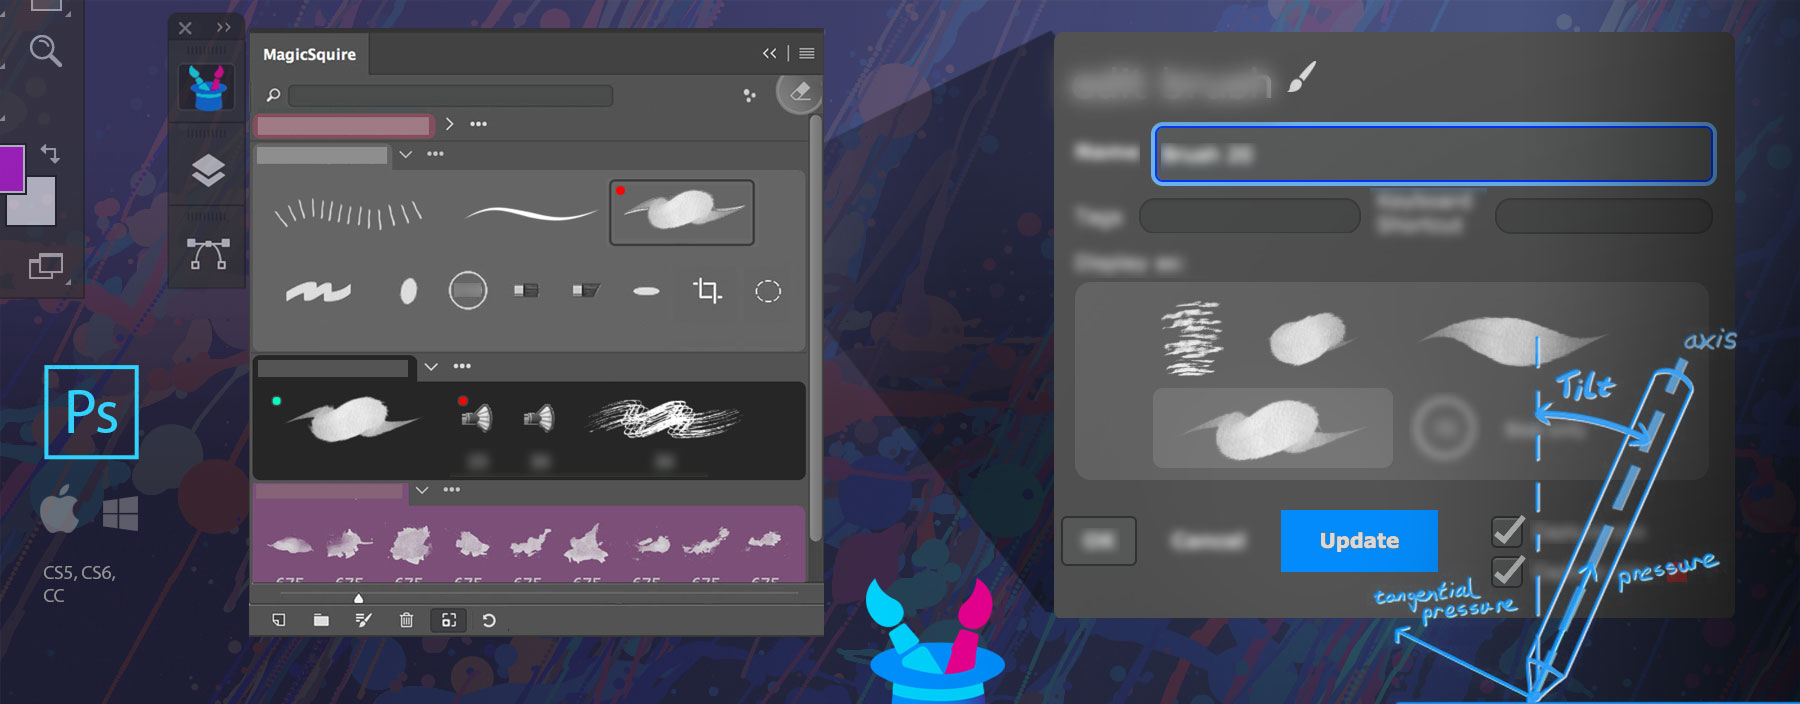
Finally you can update existing brush or tool settings – like Tilt, Brush Size, Shape Dynamics etc – in Photoshop using MagicSquire.
Update brush parameters in Photoshop with MagicSquire
Double-click on the brush or click Edit button to bring up Edit Brush/Tool dialog, then change parameters in Photoshop and click Update button! No need to delete and then re-create brushes anymore!
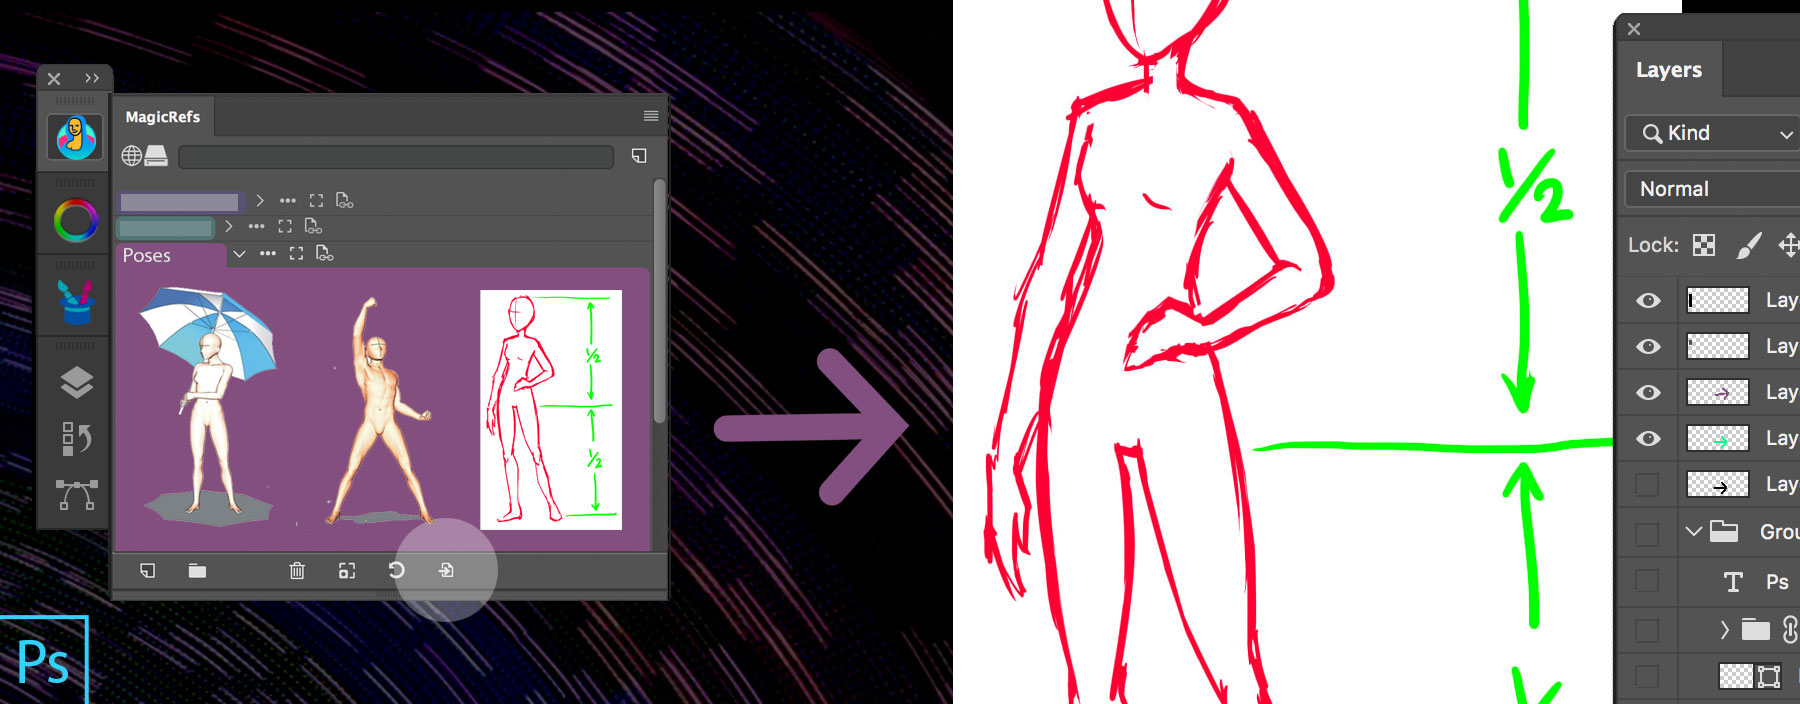
MagicRefs offers a deep integration with Photoshop. Without switching panels or software, with a single click inside your document you can insert a reference image from MagicRefs group into a new Smart Object.
Just click “Insert into Document” button. Works with multiple images.
Insert reference image from MagicRefs into Photoshop Smart Object
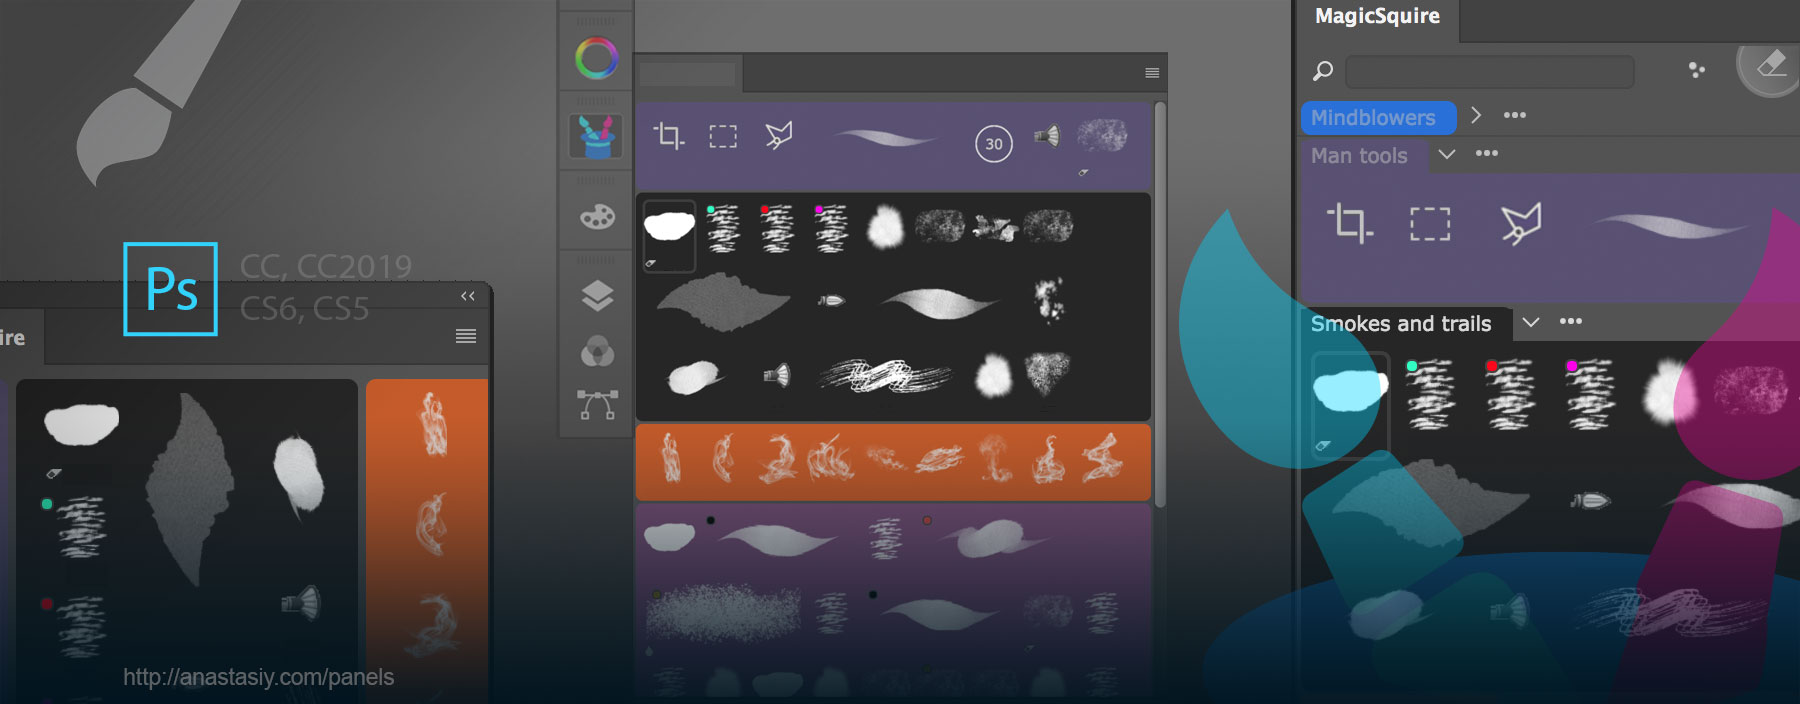
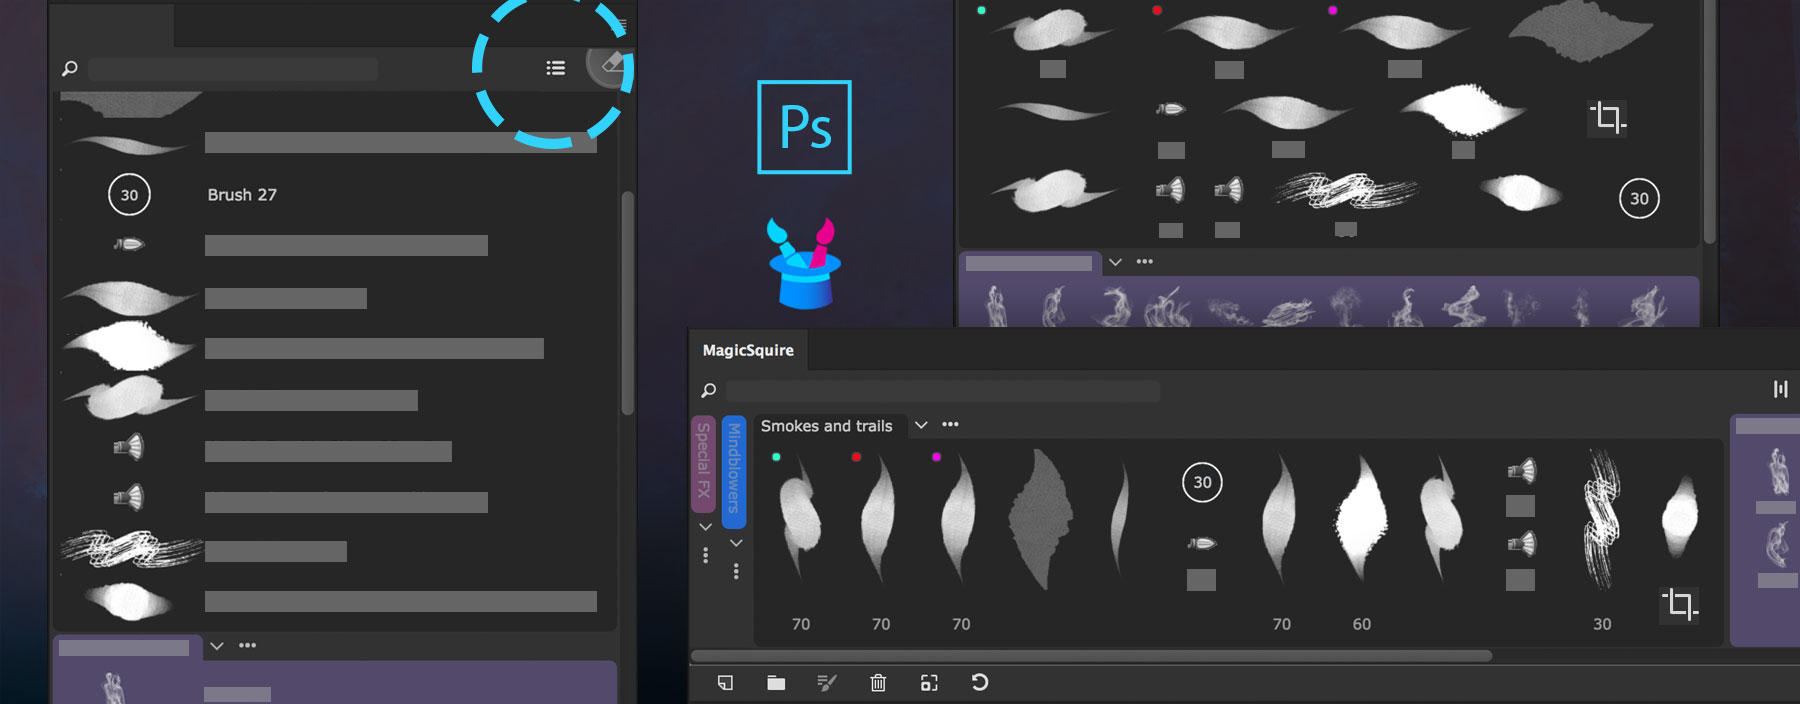
MagicSquire 3 offers different view modes depending on your Panel workspace in Photoshop, including two additional modes to what Photoshop offers.
MagicSquire Brush List View Modes
Two plain lists including long one (on the top left on the picture) and multi-column, also mixed mode (on the top-right) where you can see all your brushes at once and the horizontal one (right-bottom of the picture above) so you can attach MagicSquire panel to the bottom of your screen.
Click the “Change list display” button on the top right of the MagicSquire panel to switch modes.
See the brushes the way you want and quickly find the relevant one!