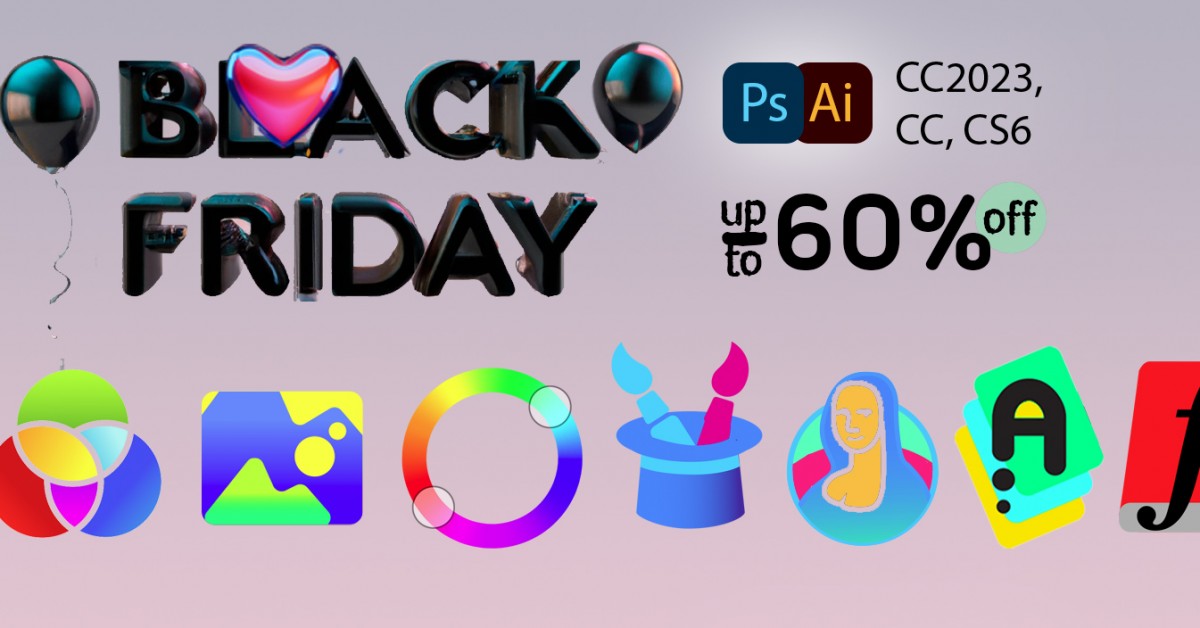
It’s ON! #BlackFriday and #CyberMonday discounts up to -60% on MagicPicker Pro Color Wheel HUD, MagicTints AI Color Matcher, MagicSquire brush control for Adobe Photoshop from Anastasiy:
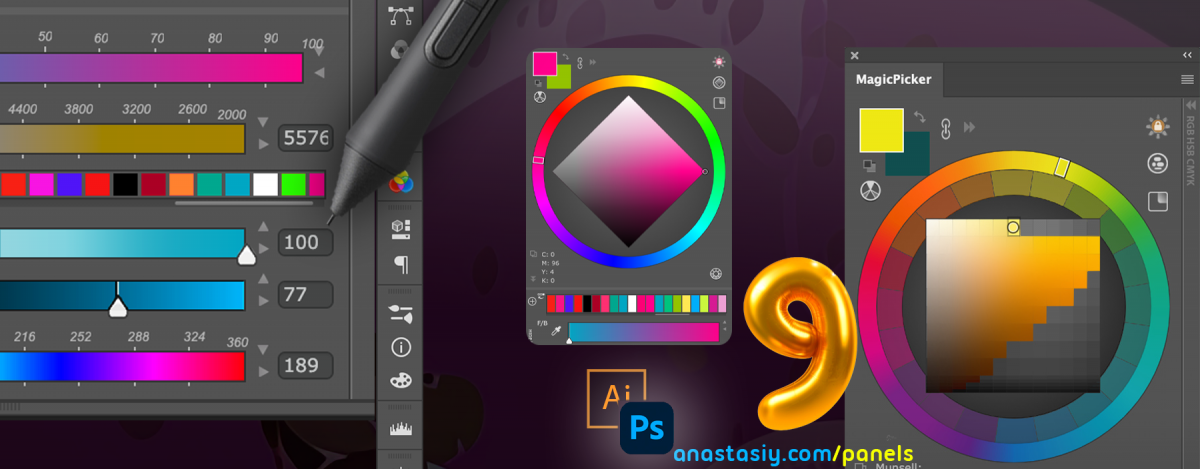
New MagicPicker 9 brings Color History! Draggable between Sliders.
Enter Values on every slider (including Temperature).
Legendary Munsell Color Wheel! Paste colors to MagicPicker (Like “255,255,10” or #fff or even “2.5YR 6/6” or see how “Persian Rose” looks like). There’s more!! Pin HUD to the same place, Vector Opacity, Slight color changes with Ctrl+Shift. Full CC 2023 support. Even more features, faster UI!
* Improved UI performance! New framework update, for blazing fast clicks, drags and other UI actions
* Full support of new Adobe Photoshop & Illustrator 2023, including Keyboard Shortcuts
NEW! Enter values directly in the sliders
New switchable value inputs next to every slider (including Temperature, LCh etc)
Hide/Show with a button
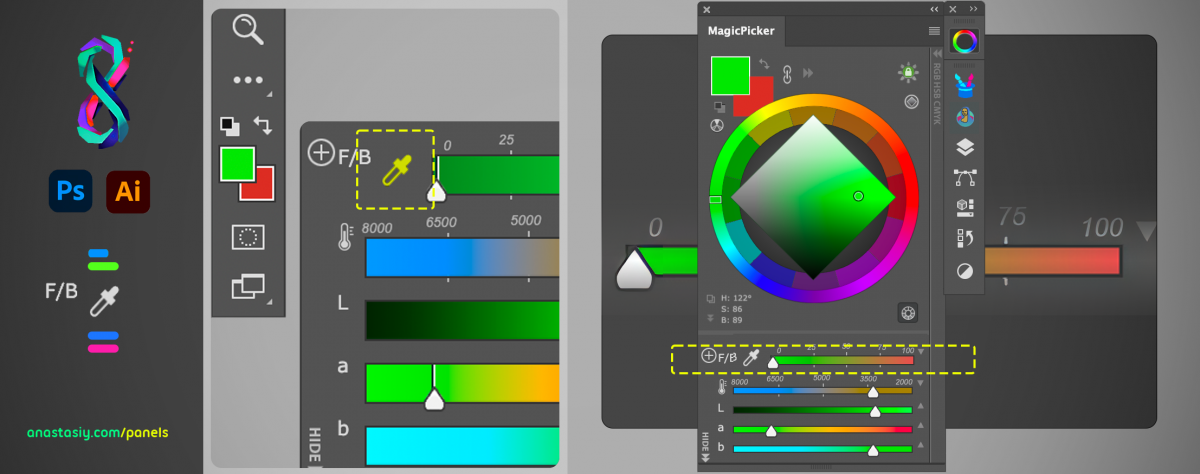
Supports HSB, HSL, Lab, Lch/HCL, CMYK, Color Temperature, Gradient between Foreground/Background (Blend),
CIE L*u*v*, Grayscale, RGB
NEW! Have a constant place for the HUD on the screen. Activated from Settings
“Pin HUD to same place”,
When ON keeps HUD show up at the same place on your screen
When OFF, HUD will show up at the cursor position
Doesn’t let the HUD cover your image
NEW! Munsell Color Wheel – industry standard, with human perceived gamut-limiting in mind
Switch it on using Color Wheel Mode button on the top right
Can display Munsell values on the bottom of wheel
Features extended ranges of Red, Blue and Yellow
Paste munsell data into color wheel (decode) using new Color from Clipboard feature
Supports Red Up mode
NEW! Color History as a slider! Scalable, selectable, scrollable.
Add new Color History using the same “+” button that you use to add sliders
Use Color History with any combination of sliders
Preserves color between sessions
NEW! Paste colors from clipboard – have a text and MagicPicker will convert it to a Photoshop foreground/background color
Paste RGB, Hex, HSL, CMYK
Paste colors by name! Like “Green”, “Red”, or even “Electric violet” – see how colors look like!
Use #123456 for hex colors or 255,255,255 for RGB colors
Use hsb(1,2,3) for HSB colors or hsl(10,2,3) for HSL colors
Supports lab, rgb, hsl, hsb, cmyk, xyz, lch, luv – using “luv(value, value, value)” (example)
Use “2.5YR 6.0/6.0” style for Munsell values
Set up “Color from Clipboard” keyboard shortcut for pasting in Settings -> Keyboard Shortcuts
NEW! Make it blueish or make it warmer – use Ctrl+Shift on sliders to move the pointer slightly towards mouse cursor/new color
when you Ctrl+Shift+Click on the sliders
NEW! Change vector opacity!
Works in Illustrator and Photoshop vectors
When vectors are selected and automatic Opacity button appears under colors, click on it and use slider to adjust opacity
of current selection
– Added Munsell Color values to the bottom left corner of the color wheel, with current color values
– Now HUGE (full panel size) alt-click color preview dynamically changes when current color updated in Photoshop
– Streamlined panel update process, there’s no need to look for serial numbers anymore
– Fixed an issue when some buttons didn’t react on mouse hovers – especially Exchange Colors and Forgeround/Background colors
– Fixed a rare issue when in certain configurations with white foreground color when starting MagicPicker it would show up as white with no hues
MagicPicker lets you pick colors halfway between foreground and background using F/B slider. Click on the eyedropper on the slider to pick current foreground/background colors into gradient from Photoshop. Then move slider to acquire intermediate colors.
Add/use more sliders in MagicPicker!
Works in Photoshop & Illustrator CC 2023 and below!
MagicTints 3.1 is out! 🔷♦️🔶 Improved: Quickly match any image to any color palette/image and specify target color areas. 👍🏿 Fixed Edit In… in Lightroom/Desktop. Better Layer handling in #Photoshop, more!
WHAT’S NEW:
– Desktop: Correctly handling “Edit In…” in Lightroom
– Desktop: Correctly handling drag’n’drop of files on MagicTints icon on macOS
– Fixed Photoshop bug: when layer was positioned vertically above document it was positioned in a wrong way
after color matching
– Fixed a problem when images couldn’t be drag’n’dropped sometimes after moving groups
– Fixed problems with displaying square images in Edit Palette dialog when using Guided Colors
– Fixed EditPalette/Create Palette dialog titles
– Improved Spanish and Chinese UI localization
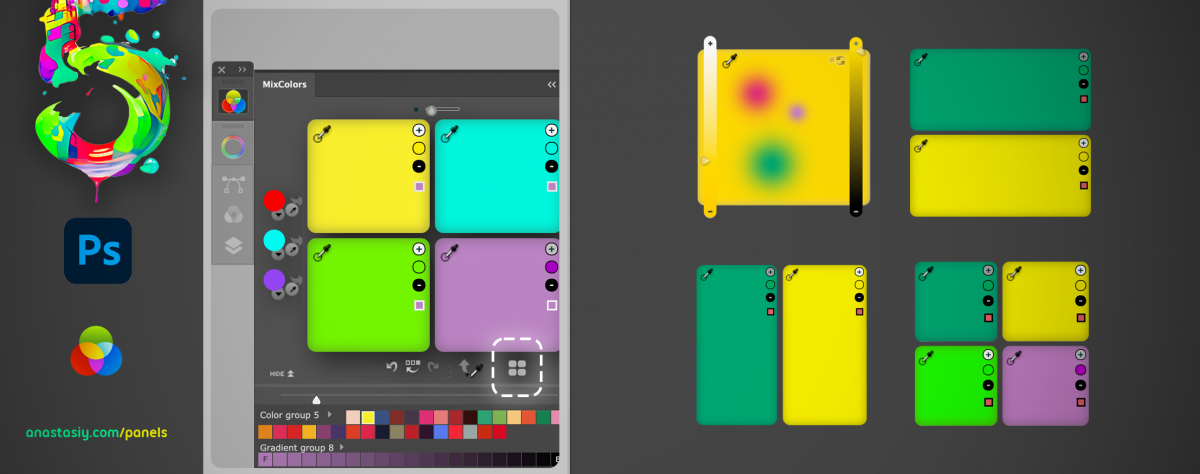
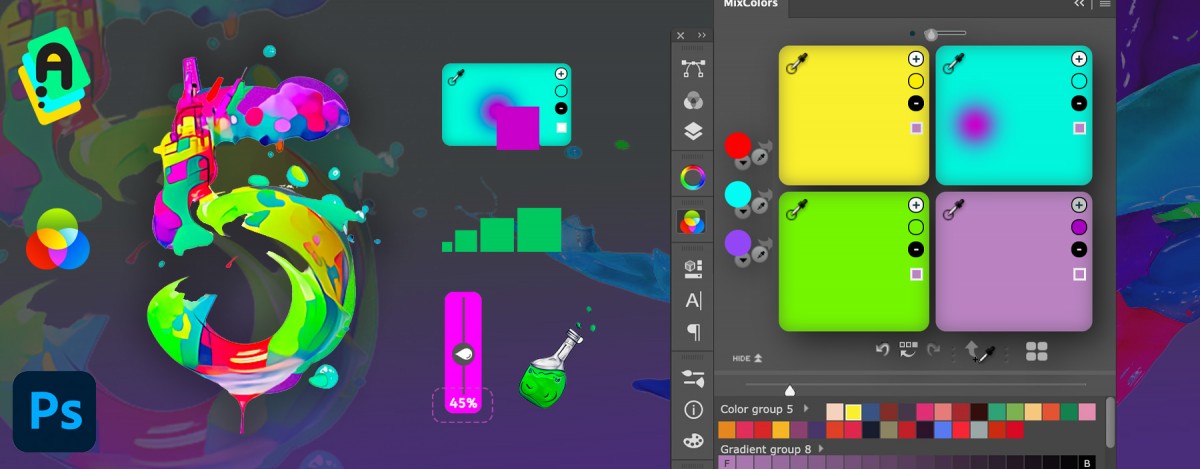
MixColors 5 is here! Brings new mode with 1/2/4 mixing fields (different colors)! Also: Scale color swatches, drop from history, create new swatches from selected, percentage display on mixing sliders, faster, much more.
NEW! Multimix Mode. New MixColors configuration.
Modern advancement of how MixColors works to keep up with new artist workflows.
– Click on the new button under main color mixing area to switch modes
– Have more places to mix in colors – 1,2 or 4 mixing fields arranged vertically, horizontally or in a grid.
– Have different non-connected mixes in these fields.
– Every field acts independently and has 5 new buttons: Add white, add color, add black, get from Photoshop,
pick color to Photoshop
– Simple click on the field to mix in current color
– Adjust “brush strength” on the top of the panel
– Mixing fields scale with the panel
– You can hide/show rearrange fields
NEW! Free scaling of swatches! Click on the new button on the toolbar and adjust swatch size with a toolbar.
– Now you can have any preferable size of the swatch thumbnails. Great option for high-res monitors.
NEW! Color sliders that regulate mix strength (long click on the field or click on the drop down near round
mixers on the left) now display percentage. That gives a much better feedback to improve your MixColors workflow
NEW! Color History improvements!
– Marks current selection
– Drag’n’drop color History swatches on the mixing fields
NEW! Selected swatch in the swatch group has current selection mark
NEW! Select multiple color swatches and move them to new group! Or copy them to new group. You should
1) Click first swatch
2) Right-click ending swatch – a new contextual menu will display
NEW! Color mixing formula improved. Adjusted by feedback from artists all over the world – to be more precise
NEW! Improved UI framework – using latest UI engine from MagicPicker 8
– Fixed all problems with exporting various swatches (from MixColors menu -> Export colors to Swatches)
– Color History now correctly preserved when panel is open/closed in all scenarios
– Right-click dialog for swatches is fixed, also fixed its behavior in multiple scenarios
– Fixed current swatch selection
– New updated and speeded up modern UI framework, that supports all modern GPU features
– Optimized for better power management on laptops, Surface devices and MacBooks
– Still supports Adobe CS5, CS5.5 and CS6 (also CC, CC2014, CC2015, CC2017, CC2019, CC2020, CC2021, CC2022+)
– Optimized to support latest Photoshop 2022
– Improved UI performance in different scenarios
– Fixed various minor UI problems
– Improved loading speed
– Optimized to work with macOS Catalina, new Windows 11 updates
– All improvements implemented by real-life users’ feedback
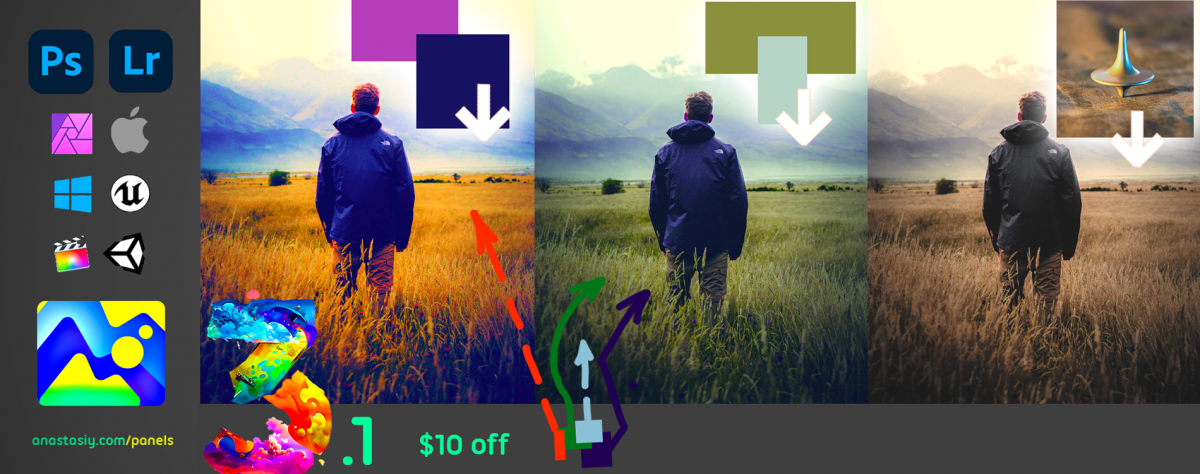
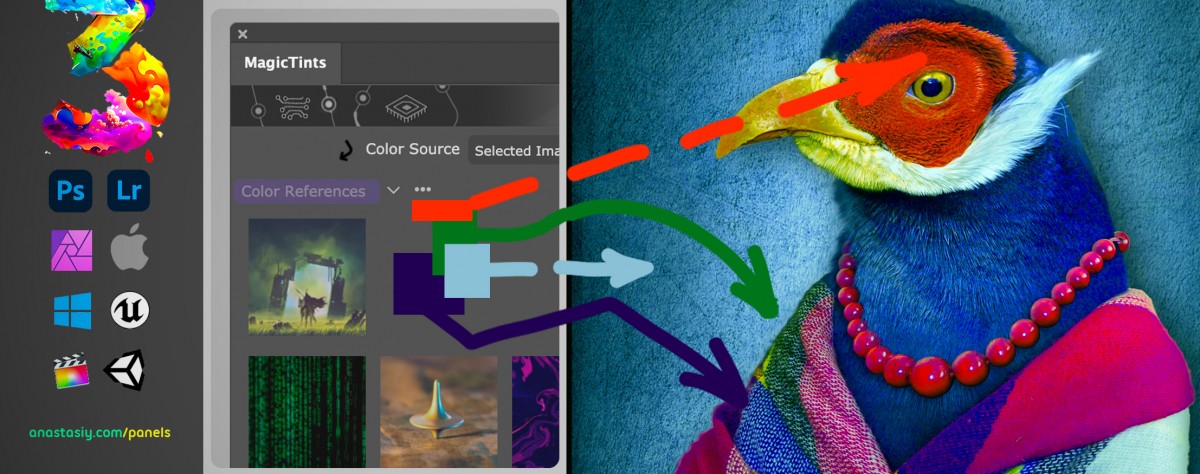
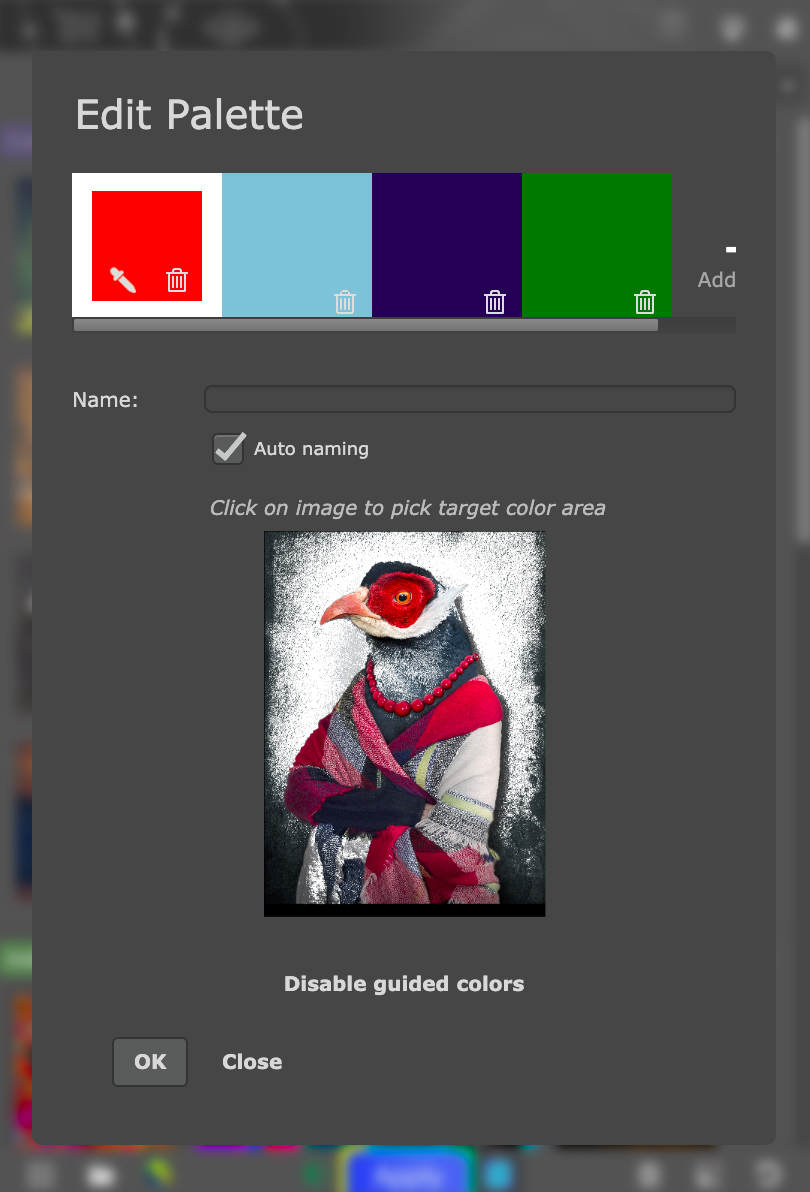
Assign specific colors to target image areas using machine learning. Create color palette in #MagicTints, then click “Guide palette to target colors on the layer” button:
Click “Guide palette to target colors on the layer”
and click on target areas on the image:
Select target areas on the image
Works with photos, graphics, concept art – any type of image.
After you close the dialog you can apply “guided colors” to the current image. MagicTints will use the machine learning engine to smartly assign the rest of the colors.
Batch-processing supported on macOS/Windows. Correctly guides to gradients etc.
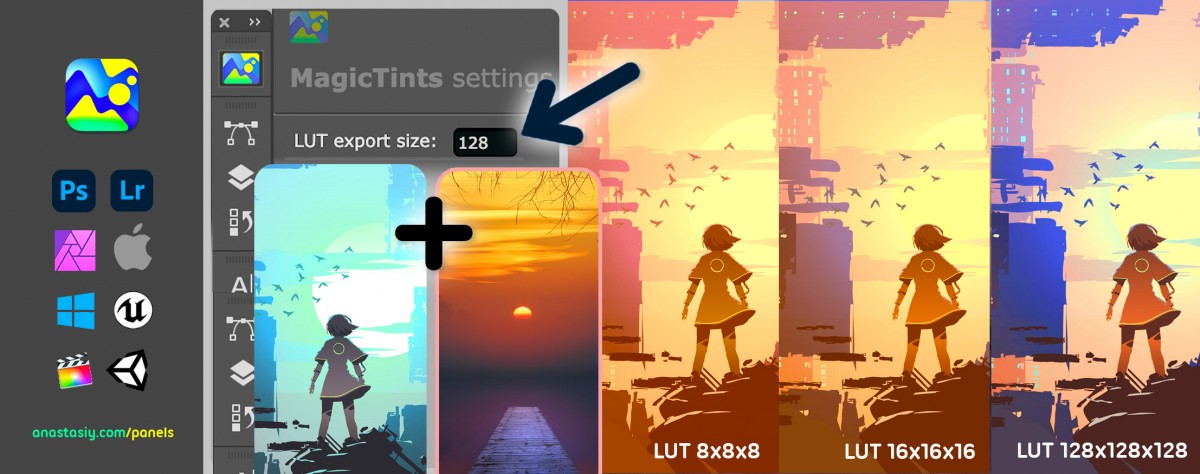
💛 New MagicTints 3.0! Color match and replace specific colors, batch processing. 💥 Use image Layer as color source, fully automated GPU color matching w/LUT export… 40+ changes, features.
– NEW! Long due! Cancel color correction at any time! New “Cancel” button in the progress dialog
– NEW! Guided colors – target image areas with specific colors
– Select target color areas directly on the image in the Color Palette dialog to guide Color correction
– Applying color correction will assign palette colors to those areas
– Edit existing color palettes to add/remove targeting
– NEW! UI Refresh, added new options for Layers, LUT Generation, improved UI framework
– NEW! Specify existing Document layers as color reference images (Photoshop-only)
– New list “Color source” on the panel.
– Works with LUT
– Supports hidden Layers – you can have a hidden layer and use it as a color source
– NEW! Edit existing color palette references – add new, remove colors.
– Double-click on the color palette in the reference list to start editing.
– Double-click on colors to change them
– Rename color palette by double-clicking its name
– NEW! Rename image references by double clicking their names on Full Image mode
– NEW! Now 100% supports all modern image formats on all platforms – as references (and main image on Standalone)
* .PSD files – Finally supporting using .psd with layers etc as reference images!
* .SVG files – Supporting on all platforms
* .TIF/.TIFF – Supporting on all platforms, all variations of .tif
* .TGA – Now supporting TGA files
* Currently supports the following image file formats: .psd, .jpg/.jpeg, .webp, .tga, .tif/.tiff, .png, .bmp, .svg
– NEW! Adjust LUT strength when generating LUT instead of applying color correction. No need to
use other 3rd party LUT editors, or create new transparent layers – just hold your mouse over
“Generate LUT” button and and enter Strength into a new popup
– NEW! New keyboard shortcuts. Current list of assignable keyboard shortcuts is:
– NEW! Apply MagicTints to current layer/image
– NEW! Add current layer/image from Photoshop/Illustrator/InDesign as ref image
– NEW! Standalone: assignable shortcut for Settings
– Add reference image from Clipboard
– Generate LUT from currently selected image/ref image
– Add reference image from file
– Create new ref image group
– Toggle ref image history
– Increase/Decrease size of thumbnails
– Toggle MagicTints panel in Photoshop/Illustrator/InDesign
– NEW! Standalone BATCH PROCESSING! You asked for it – open multiple images and color-match them all at once
to the same color reference
– NEW! Standalone: Sample colors for Palette Color Reference from the original image
on macOS & Windows (just click the eyedropper when adding colors)
– NEW! Standalone: new Recent Files to main menu with all recent images you opened
– Turn it on/off in Settings
– NEW! Standalone: Press spacebar for a quick look at image reference
– NEW! Standalone: drag images/palettes from Color References list directly to the main image to apply colors!
– NEW! Standalone: Copy images from clipboard, copy images to clipboard for better integration with your workflow
– NEW! Standalone: Main menu items:
– File/Ganerate LUT – generate LUT from currently selected images
– Images/New Group – create new Image Reference group
– Images/Toggle History – toggle chosen thumbnails history
– Images/Thumbnails larger & smaller – changes size of the Image Reference thumbnails
– Edit/Paste – paste image from Clipboard
– Edit/Copy – copy image to clipboard
– NEW! Now adds “MagicTints” to the newly created layers to better highlight the operation
– NEW! Displays a separate message when generating LUTs from images
– Fixed a problem when layer moved or resized after color matching
– Improved user interface, fixed various visual issues
– Improved user interface localization to: Spanish, Chinese
– Standalone mow correctly displays currently loaded image in the window title in all scenarios
– Fixed a problem when MagicSquire panel could be blank when Photoshop first started
– Added option to reset location of reference images to default (Reset button in Settings)
– Fixed data folder relocation
– Standalone: Improved Settings dialog
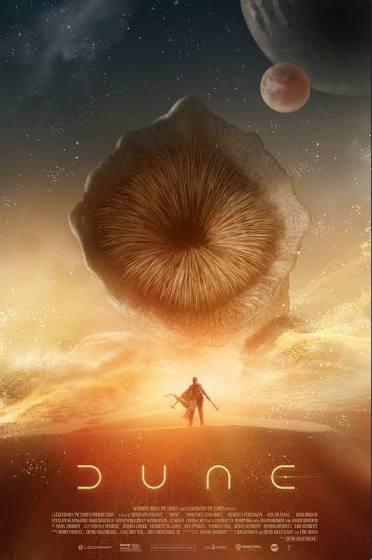
“Dune” won the Oscar for the Best Visual Effects this year!
Congratulations to Seungjin Woo, creator of concept art (and MagicPicker panel user) for Dune’s Arrakeen City and Sand worms!