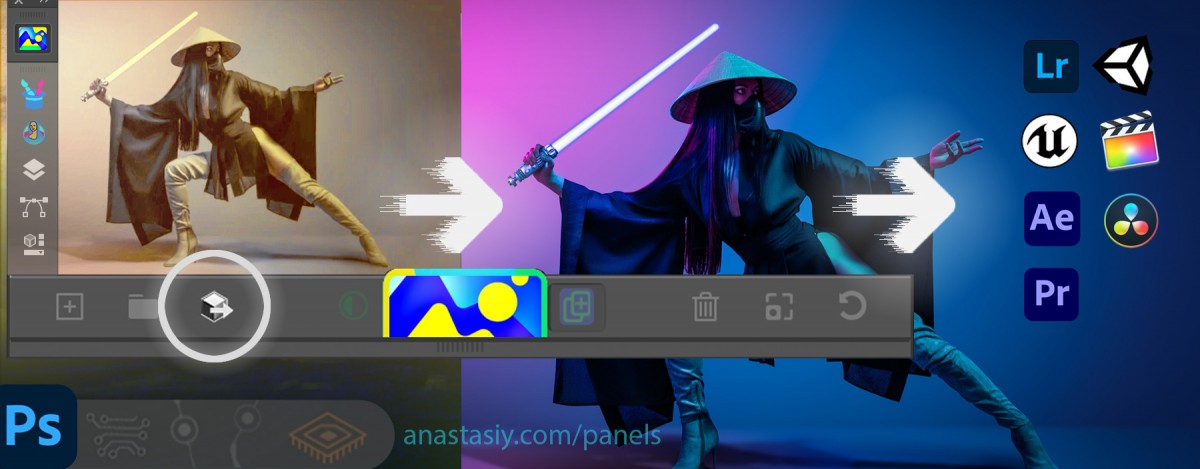
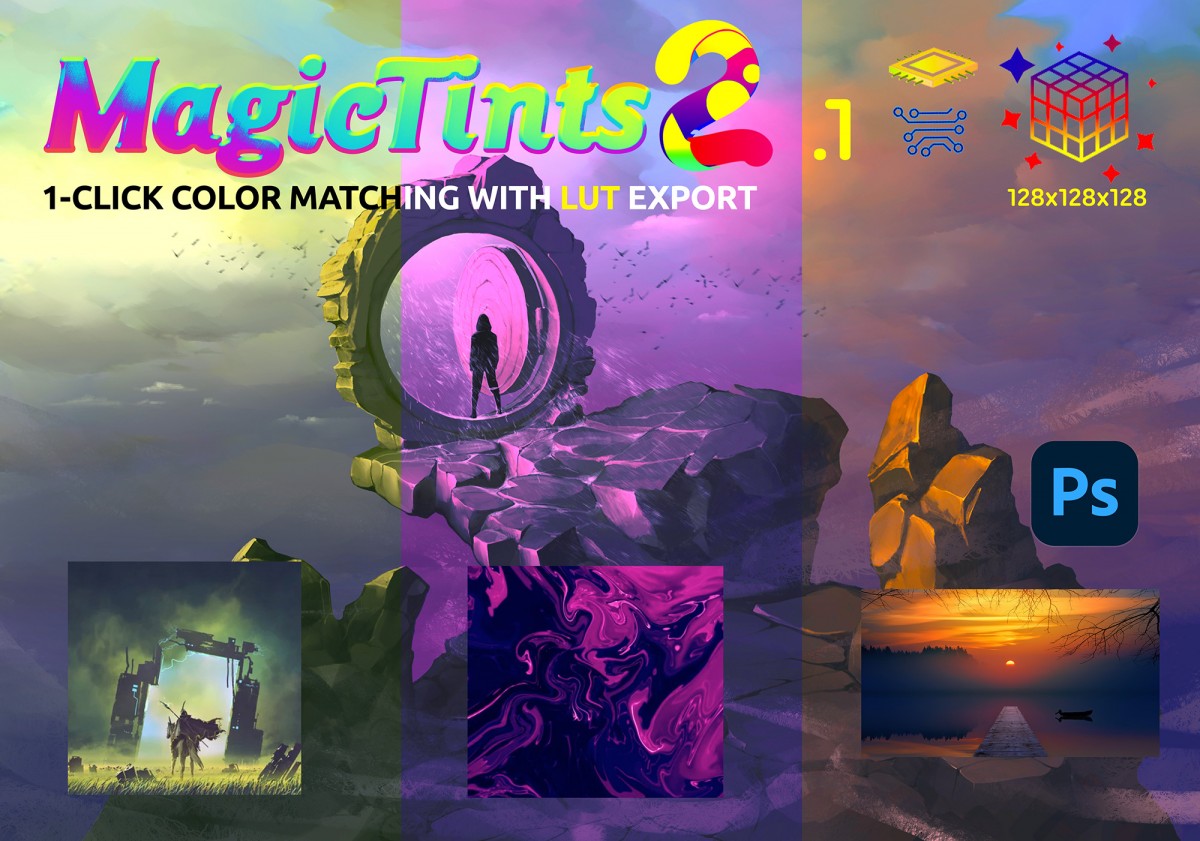
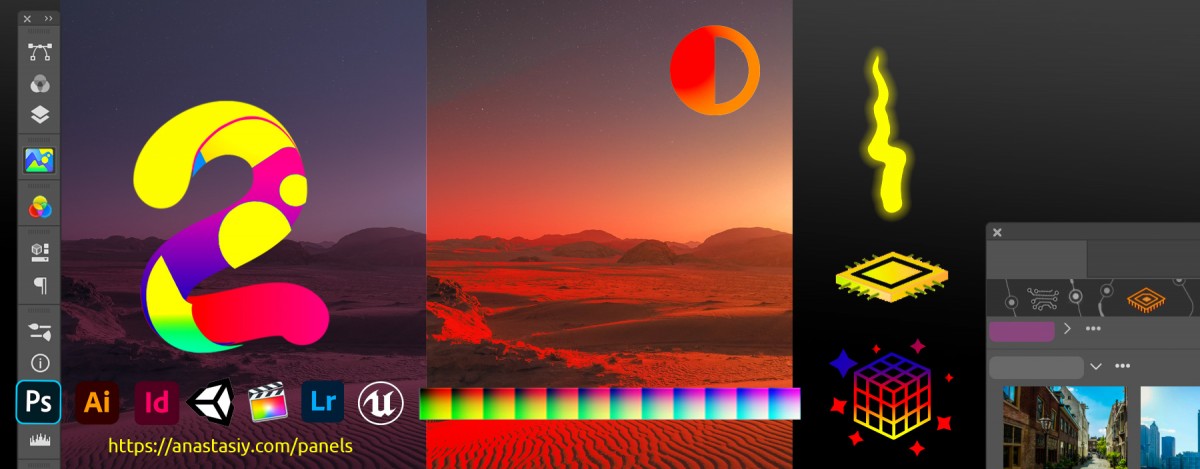
Assign your color palette to any image, or instantly match colors from another one, export LUT, new MagicTints — AI context-based color matcher 2.2 is here!
WHAT’S NEW:
– Desktop version of MagicTints is out too! Use it with any software beyond Adobe CC
– Improved CPU/GPU detection and handling
– Improved UI when processing images
– Allowed linking groups to current document only on Photoshop (Link icon next to group’s name)
– Added new keyboard shortcut to Generate LUT
– Improved messaging and links to MagicTints manual
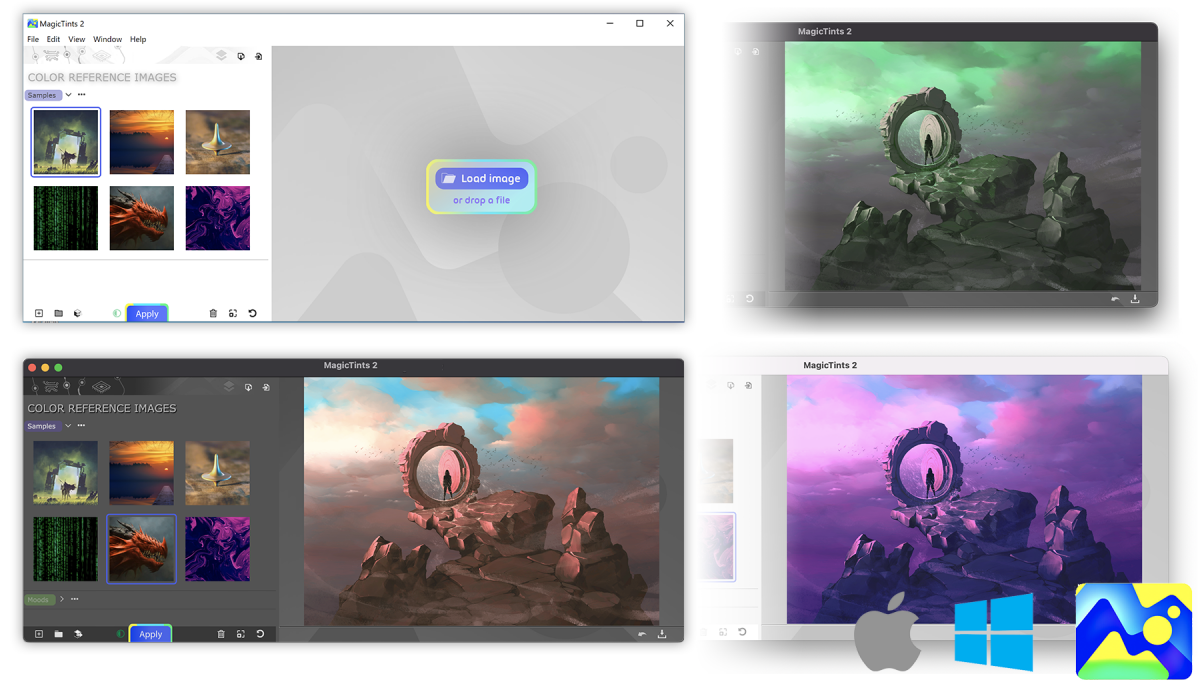
New MagicTints 2 Desktop can quickly switch any image’s colors — without Adobe CC. Works on macOS and Windows.
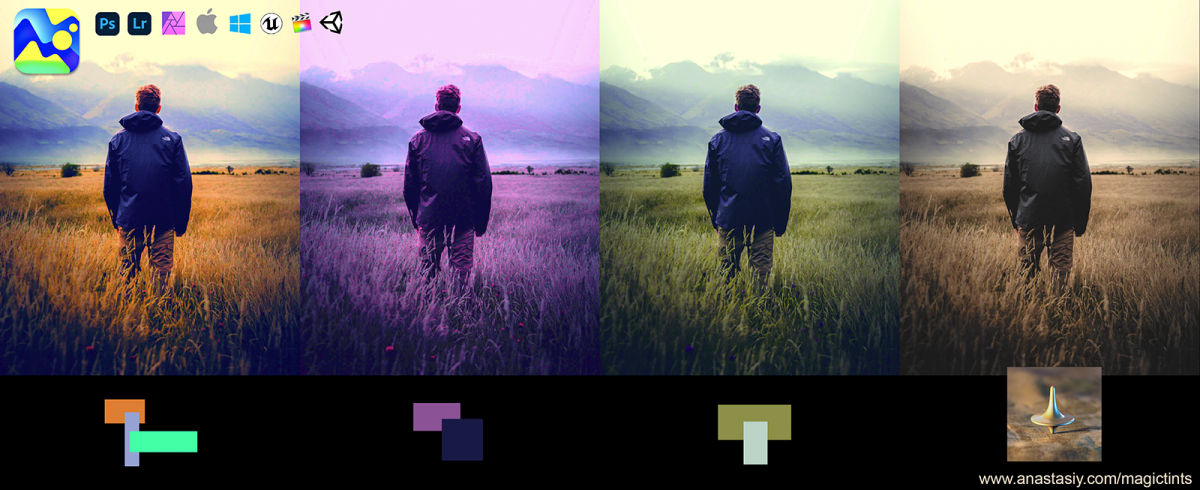
Crazy fast 1-click GPU-based Color Matching between images. Adjust Mood, bring Multiple images to the same color palette. Use with any software!
FEATURES:
– Use it together with any software: Affinity Photo, Lightroom, Sketch, Unity, GIMP, Final Cut, AfterEffects, Pixelmator. No CC subscription required. 2x faster than plugin!
– Exports LUT or images
– Brings multiple images to the color and aesthetics of existing image
– Switch lighting conditions or mood of any concept art, photo or texture
– Keep original micro-contrast, dynamic range, subtle details
– Smartest color correction ever! Accuracy on subpixel level. Machine Learning core handles 8K+ resolutions. Uses your NVidia, Apple M1 or AMD GPU
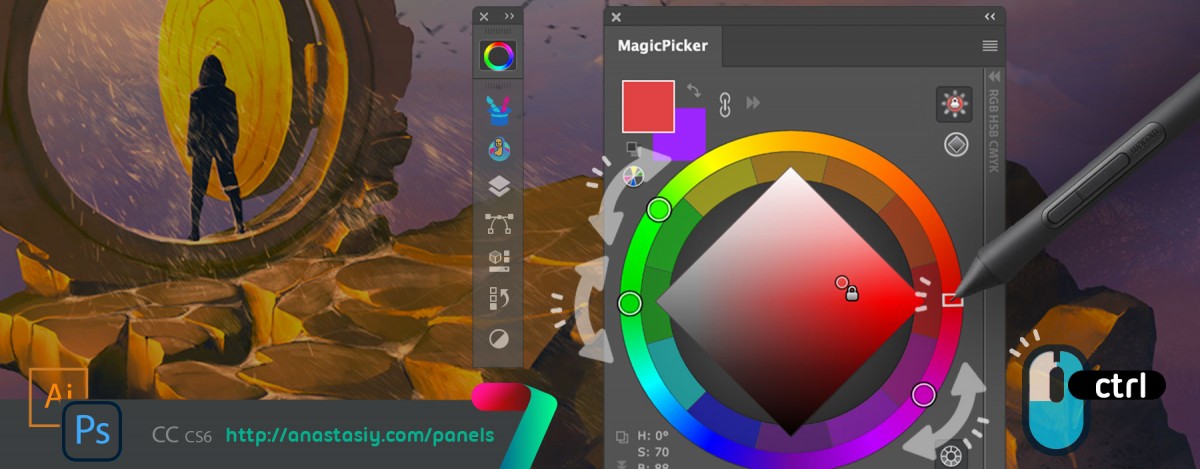
– uses MagicPicker UI engine for faster speeds.
– more
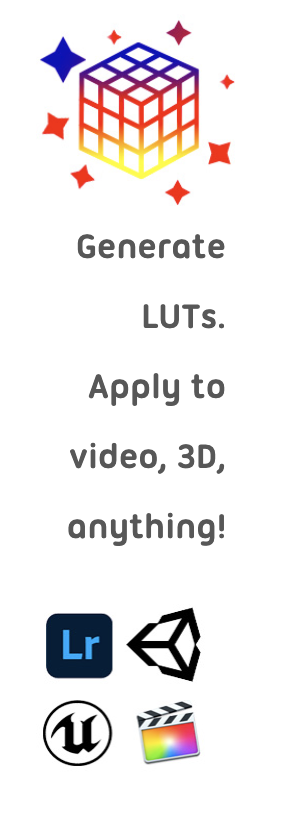
Create your very own, precise LUT in ❖ one click ❖, from a reference image in Adobe Photoshop. Then use it to color grade any footage or imagery in other software – for 3D, video, primary color grading, animation, in any post production.
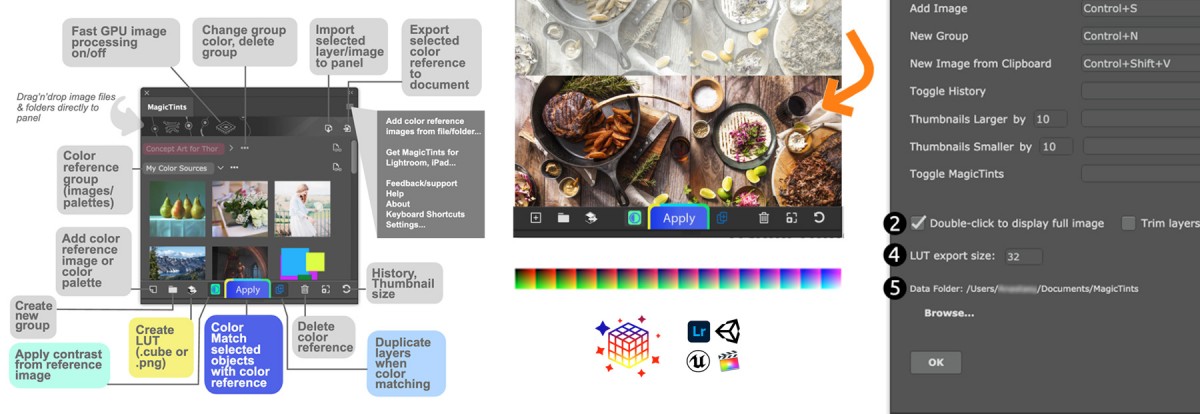
Select a color reference image in MagicTints
Click a button on the bottom toolbar and save .cube or .png. One click!
MagicTints exports LUT in any size. You can specify arbitrary LUT size in settings – for example 16x16x16, 17x17x17, or even 128x128x18.
v2.1
– Now correctly works in the environment with two-byte characters (like Chinese)
– LUT 128x128x128 is now possible! Now correctly exports large LUTs of 64x64x64, 72x72x72, 128x128x128 etc..
– LUT generation is much faster
– LUTs are now much more precise, especially on big sizes (fixed problems with desaturation and banding)
– Now there are no limits on source image size when creating a LUT
– The GPU icon on the top is now less visible when GPU processing is disabled – to distinguish between sates
– Fixed a problem with partial color matching on AMD GPUs
– Fixed a problem with some LUTs (like 17x17x17 and 128x128x128) not opening in Photoshop and 3D/Video software
Transfer a Color Scheme from one still image to another in Photoshop, Illustrator, InDesign
Generate a LUT from just a single color reference (LUT can be used to grade video footage in other DCC software, or in game engines like Unity and UE4)
MagicTints 2.0 update is here! Color Grading Revolution! No need to spend hours to create LUT, just specify one target image with reference colors and that’s it!
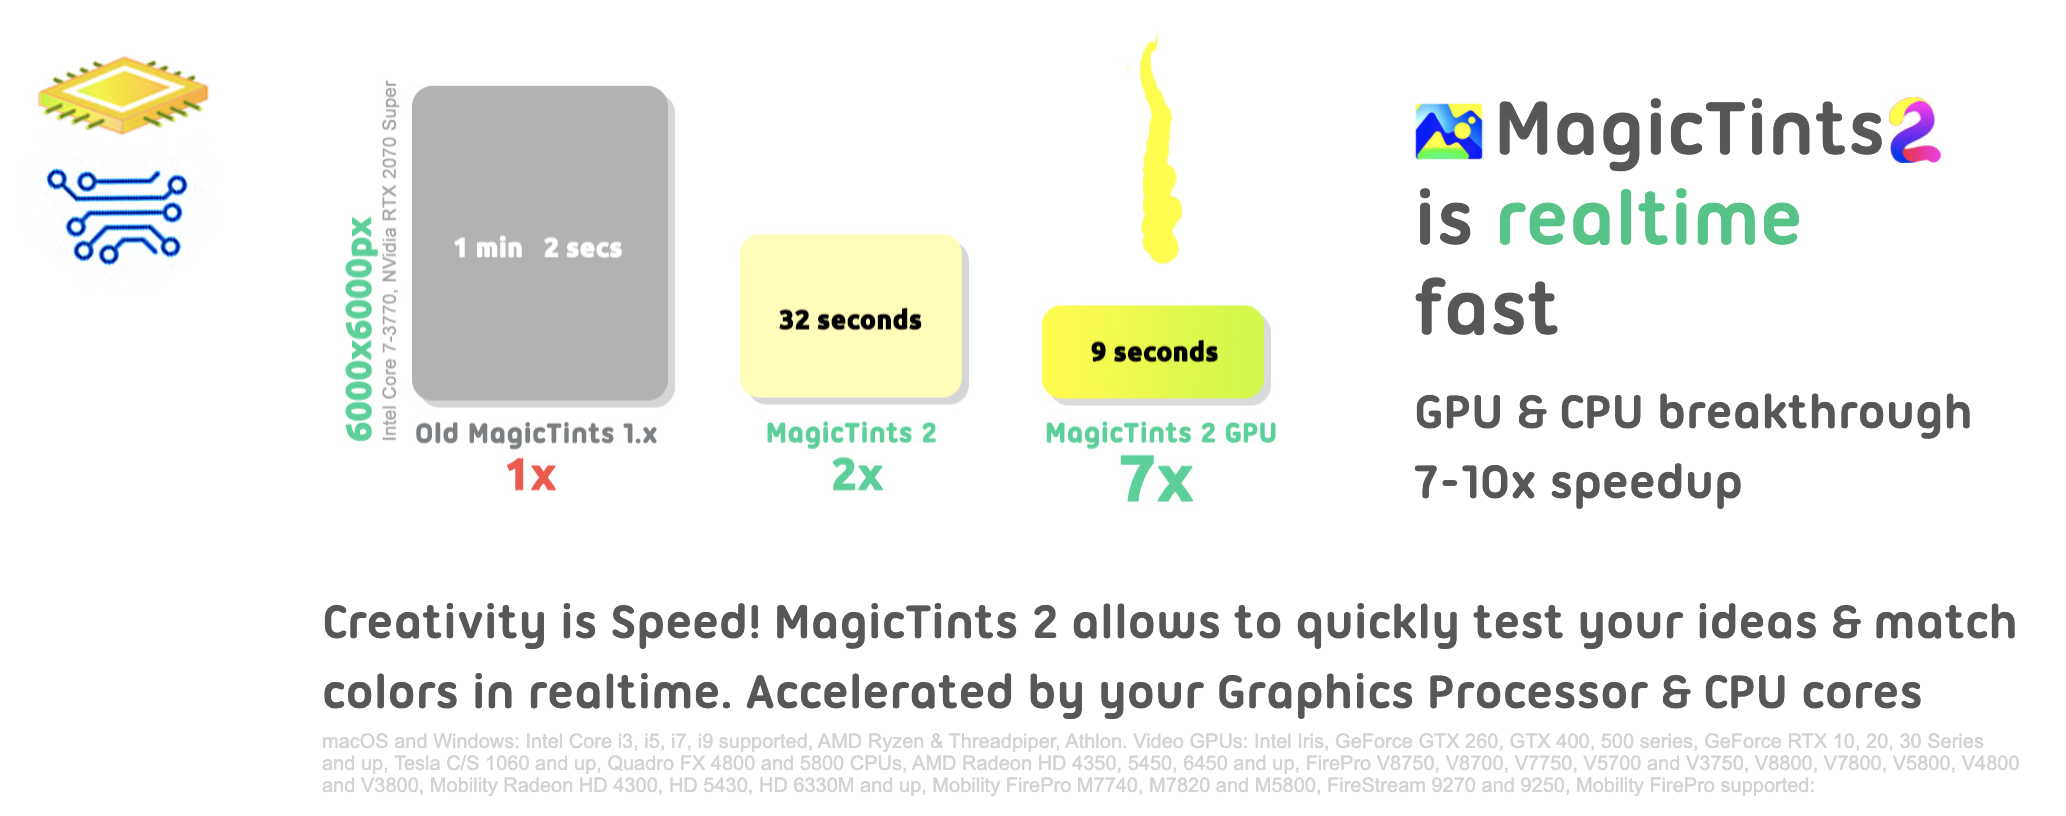
WHAT’S NEW: – NEW! Incredible speed improvement.
Greatly improved color matching speed on macOS and Windows – especially for high resolution images of 4000x4000px, 6000x6000px etc and higher.
Now works 7-10x faster.
– Image processing is much faster
– Image loading is much faster
– Uses newer CPUs parallel features of Intel (Core i5, i7, i9), AMD (Ryzen/Threadpiper)
– Uses GPU acceleration of NVidia, AMD and Apple videocards for unprecedented speeds
– Easily processes images of high resolution
In addition:
– Better GPU and advanced CPU detection are now clearly visible on the panel
– You can see how speed is improved by hovering your mouse over those buttons
– You can click on the GPU icon to disable GPU acceleration
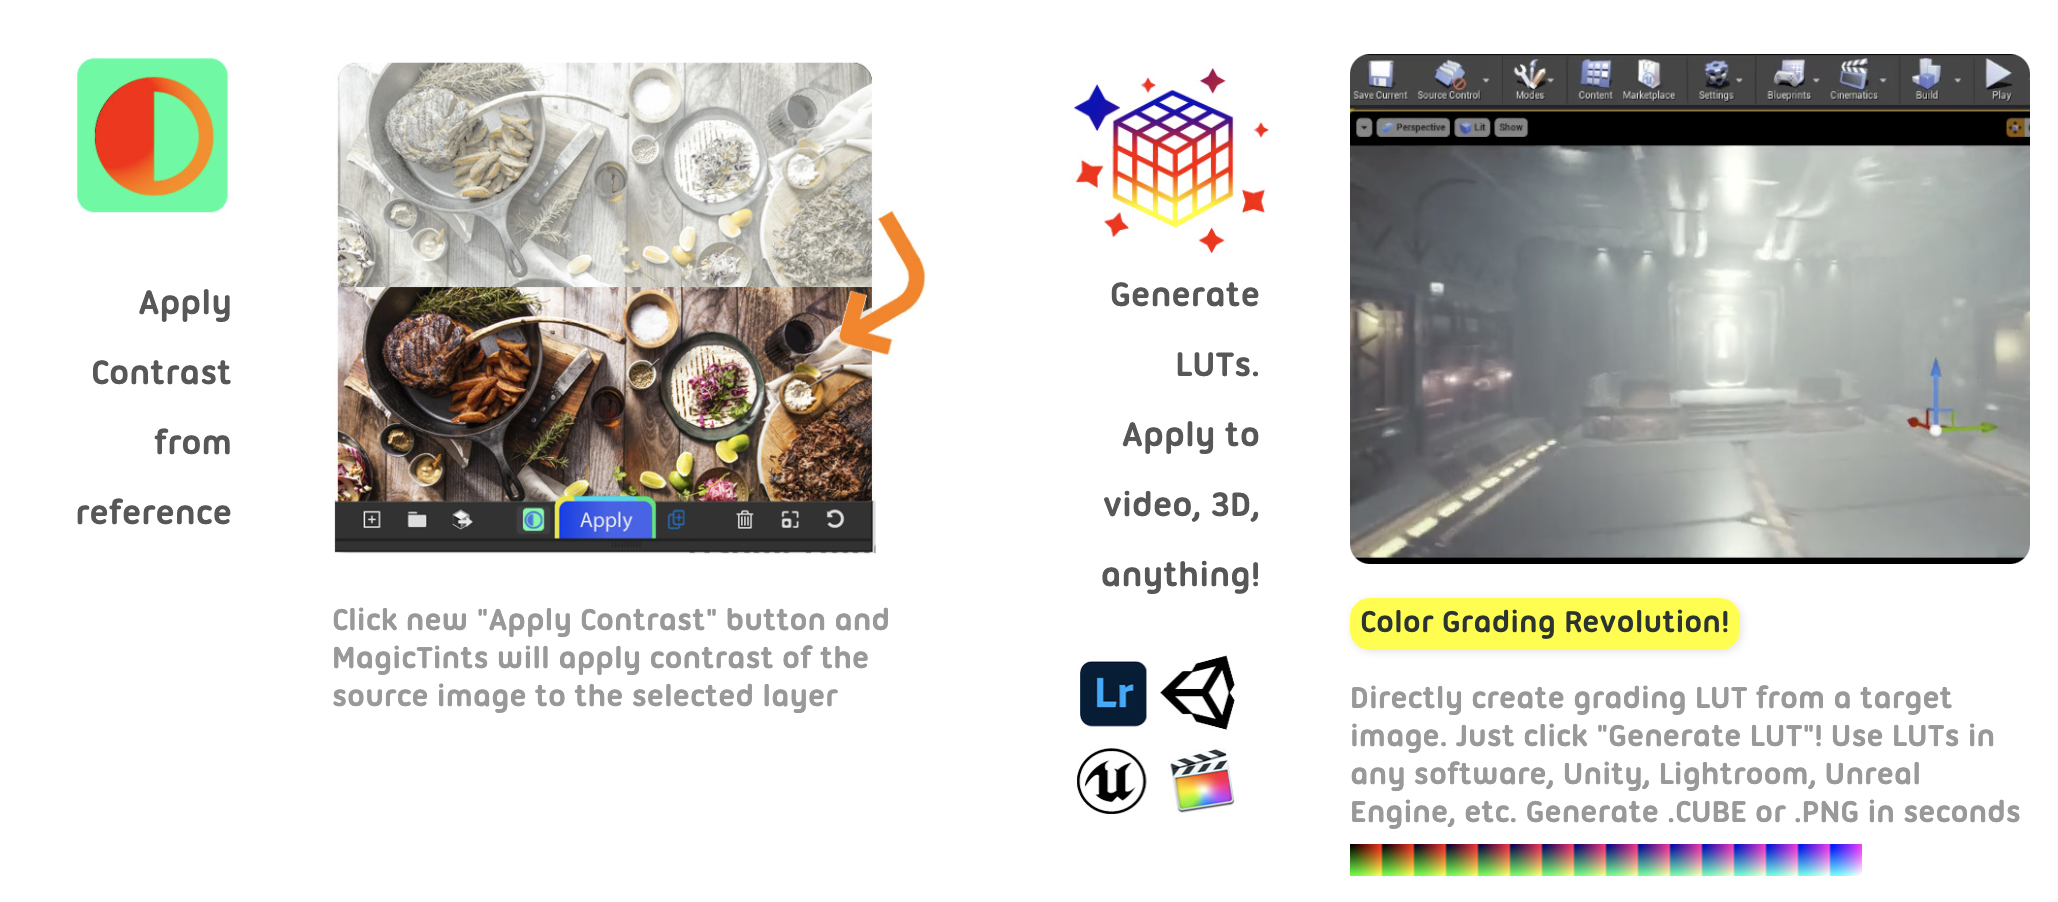
– NEW! Color-grading revolution – MagicTints now exports LUT tables. – 1-click Primary Color grading is now possible
– Pick an image as color reference and create a Color-Lookup-Table (LUT) to convert any image to that color
– Click new “Generate LUT” button on the toolbar to generate a LUT from selected images
– Use created LUT in Unity, Unreal Engine, Premiere, Final Cut, AfterEffects, Lightrom, Photoshop, DaVinci Resolve – any software that supports LUTs
– Apply result from MagicTints to the whole Video Footage or a batch of images
– Or use it in hardware LUT Boxes
– Works both for Video Production and color grading of still images
– Exports .CUBE and unwarped .PNG (for Unity/UE)
– Supports arbitrary LUT sizes: 17x17x17, 25x25x25, 16×256 etc.
– Enter any LUT size in Settings
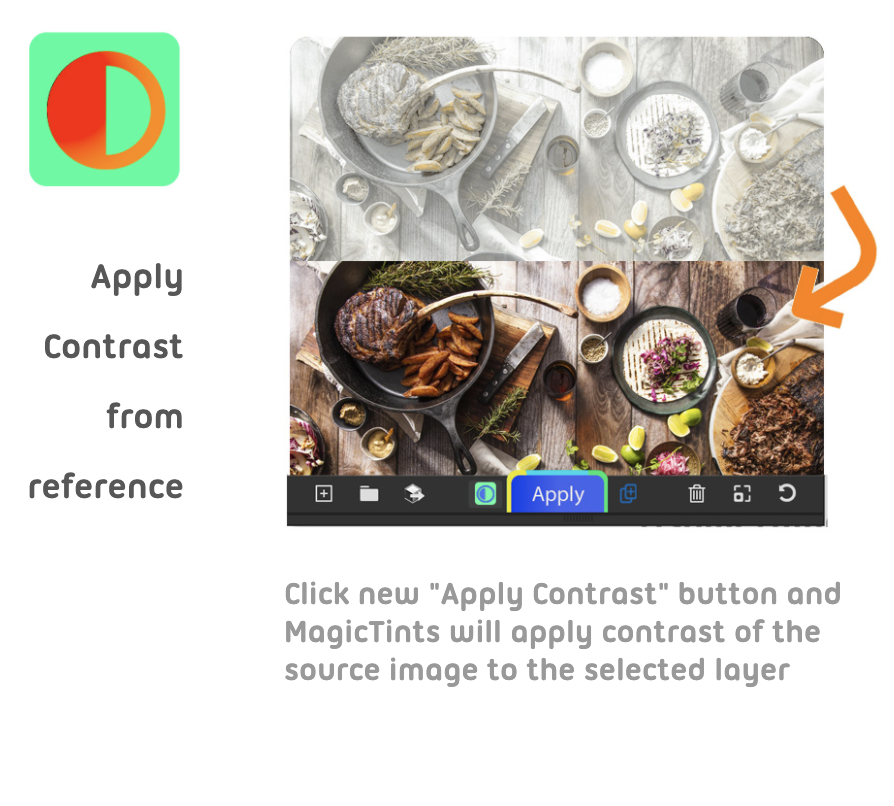
– NEW! New advanced color grading algorithm now can apply contrast from color reference
– Click new “Apply Contrast” button on the left to “Apply” button to activate this mode
– In this mode MagicTints will apply contrast of the source image to the selected layer
– Transfer look from print to negative or from a high-contrast image to low-contrast automagically
– Combining this with LUT export you can apply contrast in your Video Editing software on the whole footage
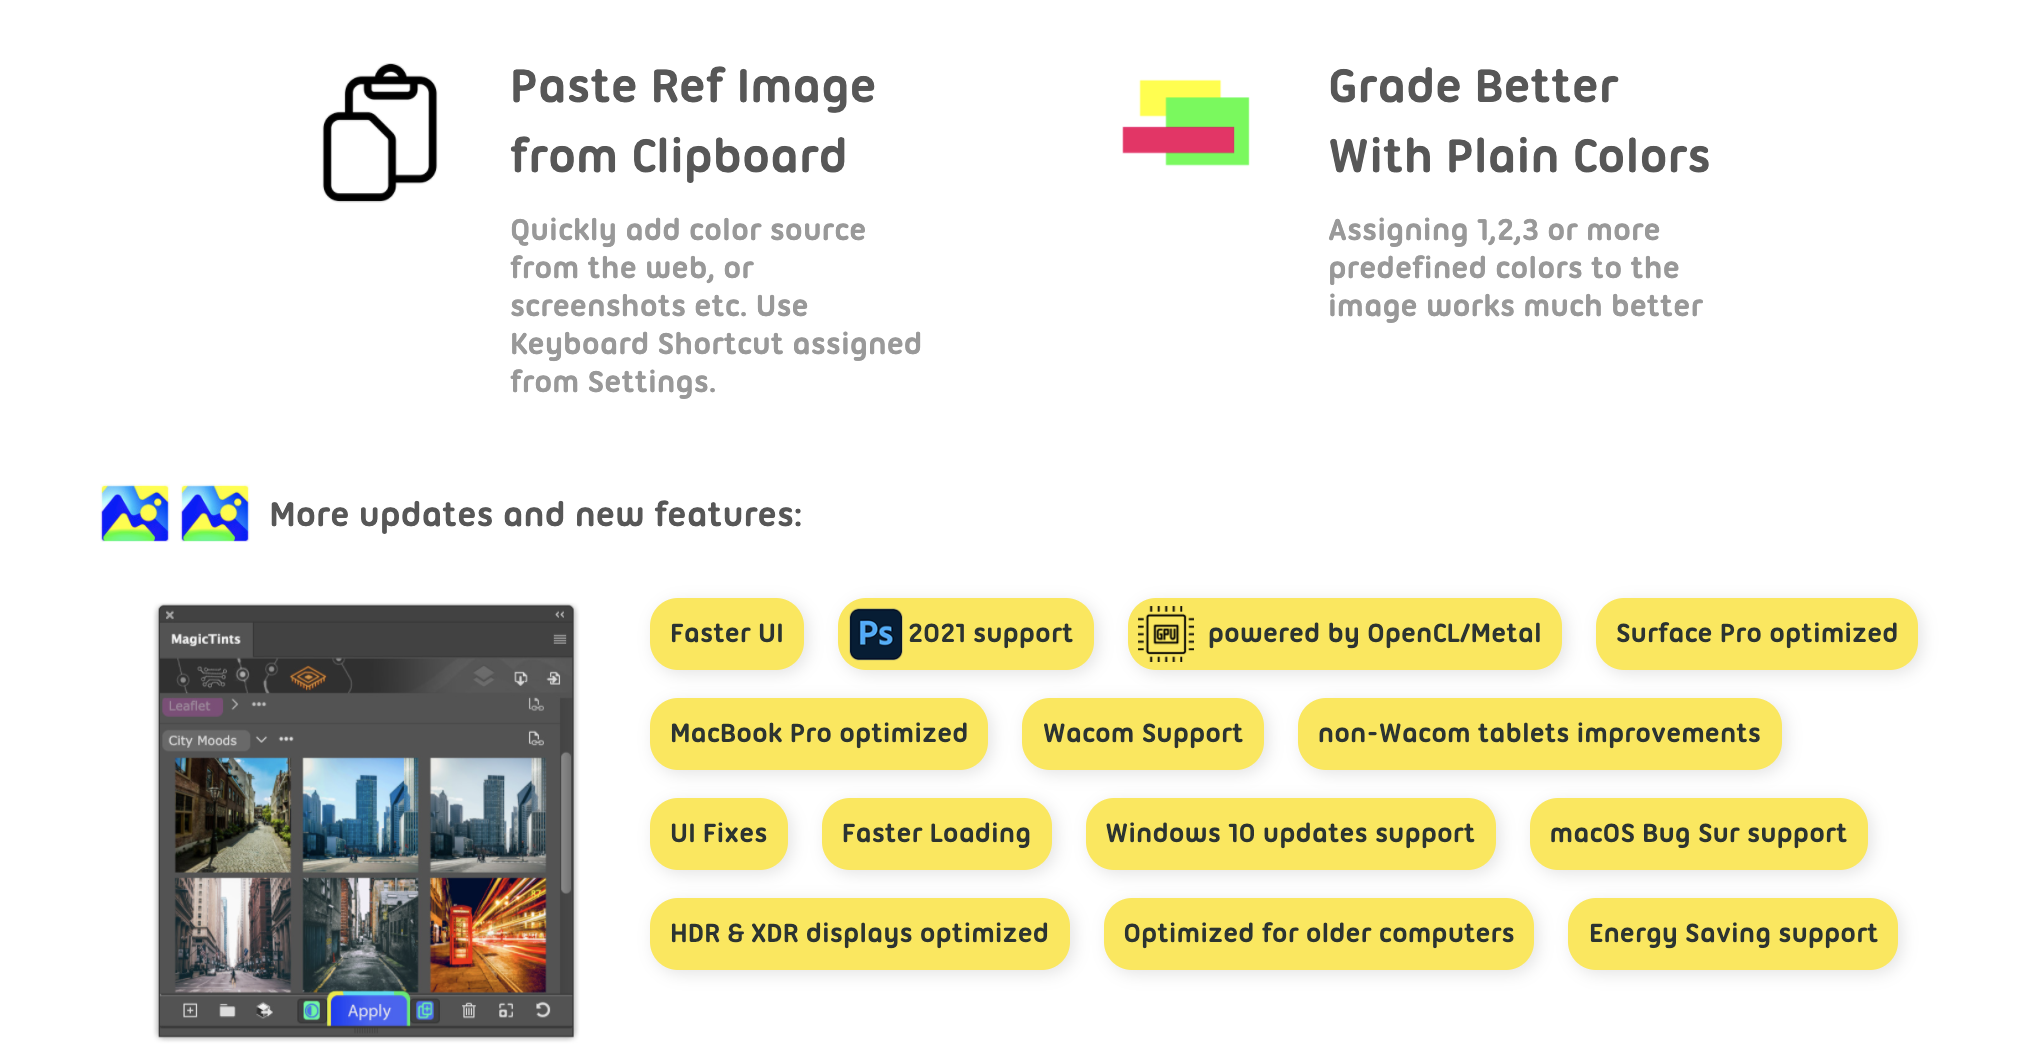
– NEW! Better color matching to Swatches. If you use plain color swatches as color source you will see much better results
– Easily assign 1,2,3 or more predefined colors to the image, now works much better
– NEW! Paste color references from Clipboard.
– Use Settings to assign it to a Keyboard Shortcut
– Advanced option to relocate Data folder from Settings (by clicking Browse)
– “Create new layers” button now lights up on panel start if it was activated before
– “Add new image” button is now consistent with Photoshop UI on CC2020/2021+
– Improved inserting images from Photoshop on some international platforms
– Improved Keyboard Shortcut handling with multiple Photoshop Workspaces
– New updated and speeded up modern UI framework, that supports all modern GPU features
– Optimized for better power management on laptops, Surface devices and MacBooks
– Optimized to run on older computers
– Supports Adobe Photoshop CC2014, CC2015, CC2017, CC2019, CC2020, CC2021+
– Better support of Surface Book and Surface Pro
– Better support of non-Wacom tablets
– Improved UI performance in different scenarios
– Fixed various minor UI problems
– Optimized to work with macOS Big Sur, new Windows 10 updates
– Correctly works with XDR and HDR displays (on OpenGL supported GPUs)
– All improvements implemented by real-life users’ feedback
New MagicRefs version 2.1 improves Pinterest boards import, fixes group color changing, Animated GIF controls improved, drag’n’drop of images, installation fixes.
WHAT’S NEW:
– Better Pinterest downloading – now supporting international Pinterest links like pinterest.co.uk
– Fixed problem with changing group colors using Photoshop Eyedropper
– Fixed problem when Full Image couldn’t have been clicked
– Fixed a problem with displaying Animated GIF video controls
– Improved drag’n’drop images from computer to the panel
– Correctly restoring full image state on close/reopen
– Fixed rare problem on some computers with signature
– Available now for Photoshop 2021, 2020, CC 2019, CC 2018, CC 2017, CC 2015, CC 2014, CS5, CS6, CC
– even more!
If your Photoshop is slow using MagicSquire, here’s a fix! v4.5 is up. What’s new:
– Fixed a rare problem when panel was too slow or slowing down Photoshop on some Adobe CC versions
– Fixed various problems with loading of specific .tpl files
– Available now for Photoshop 2021, 2020, CC 2019, CC 2018, CC 2017, CC 2015, CC 2014, CS5, CS6, CC
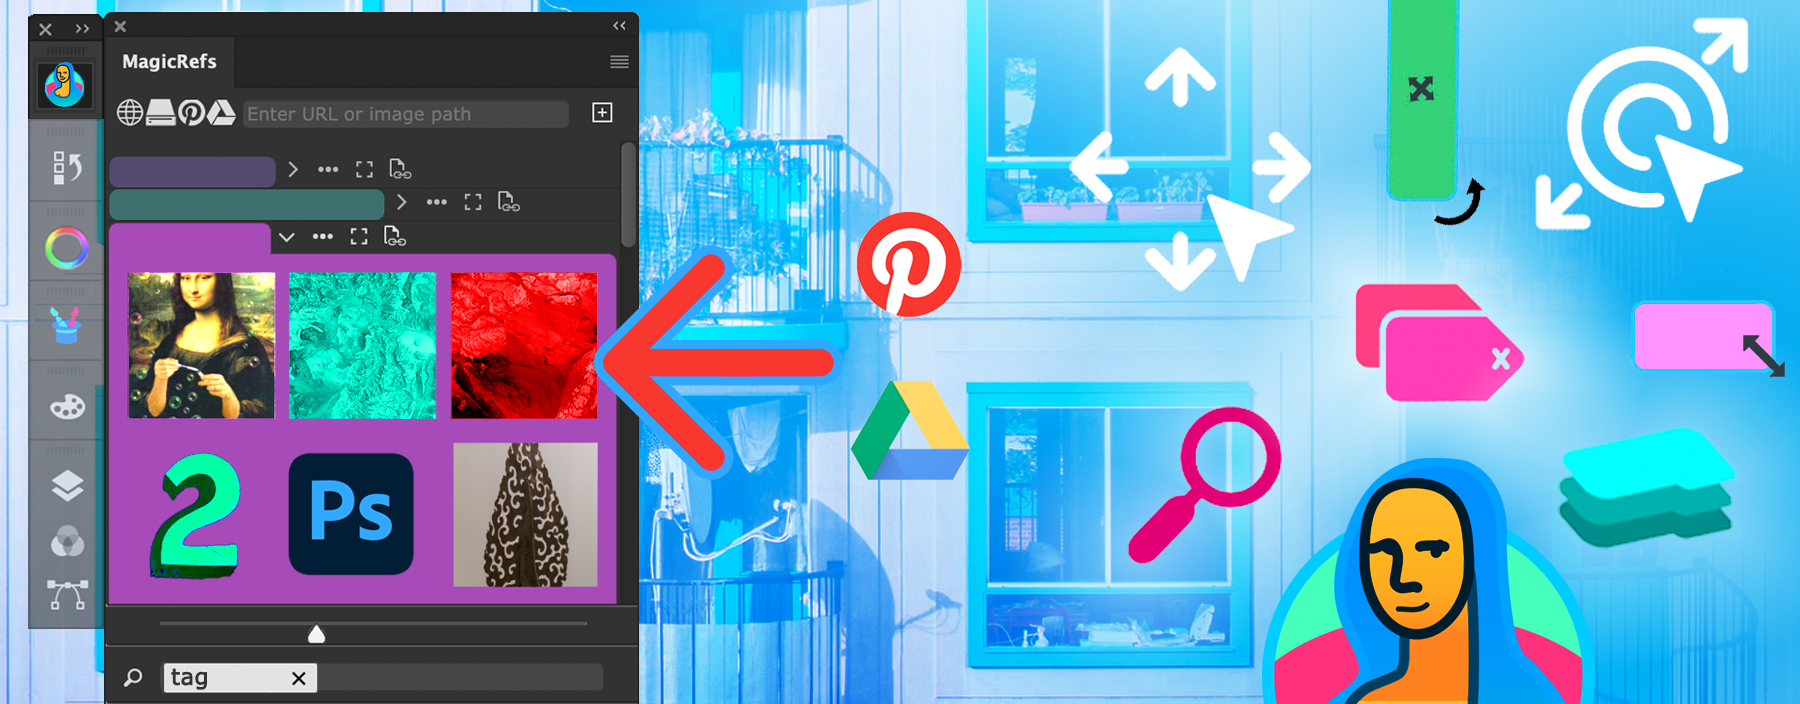
MagicRefs, the reference image organizer 2.0 is here!
Rotate, resize, move images in Comic Strip mode, direct import of Boards from Pinterest, insert Layer from Photoshop document, Tag & Search images, Collections of Groups, drag Full Image with mouse, Paste from Clipboard more!
MagicRefs 2.0 reference image manager for Photoshop: import from Pinterest, move/resize images, more
WHAT’S NEW: – NEW! Directly import Pinterest boards to groups
– NEW! Directly import Google Drive images to groups in MagicRefs
– NEW! Pan/scroll Single image with click-to-move
– NEW! Rotate enlarged Single image with new button on toolbar
– NEW! Zoom in Single image to the point with double-click on it
– NEW! Add current layer from document to the panel as an image – new button on toolbar
– NEW! Tags – assign tags to images and then filter them using Search (new button on the bottom) –
with Instant Suggestions. Filter out images that you don’t need in current project, instantly.
+ Search and filter by style, type, project, workspace, team, file, type of work or any other
favorite criteria you create by yourself.
+ Searches in closed/open groups when needed.
– NEW! Collections:
+ Combine several groups in a collection and then switch
between group combinations with one click or keyboard shortcut.
NEW: Use new Collection Editor from the menu -> Collections
– NEW! Comic Strip mode now allows direct operations with images:
+ Move (click on image and drag),
+ Rotate (click on bottom-left of image and drag) and
+ Scale (click on bottom-right of image and drag)
+ The state is saved and restored for every group of images.
+ The layout can be reset to original state with new button on the bottom
– NEW! Copy Image from Clipboard to MagicSquire image now supports more image formats
+ (use MagicRefs menu -> Keyboard Shortcuts to use it)
– NEW! Added option to reset data folder location to default
– New updated MagicRefs manual – Improved: Insert images from the panel back into Photoshop document
– Improved Drag’n’drop behavior of folders and images on the panel, also better visual feedback
– Fixed a problem when ref image wasn’t fully visible when added to the group
– Improved handling of URLs with images – more modern URL types are now supported to add remote images
– Improved handling of groups linked to Photoshop documents
– Fixed various UI problems
– Improved Keyboard Shortcut handling with multiple Photoshop Workspaces
– Improved compatibility with OneDrive sync and Windows
– Improved zoom mode when clicking on images in History section
– Image scroll/zoom is now kept between image clicks
– Fixed problems connected to Full Image display
– Fixed conflict between Full Image and Settings dialogs
– Full Image zoom scroller on the bottom now correctly reflects zoom state
– Fixed a problem when Full Image wasn’t re-displayed after closing/re-opening Photoshop
– Fixed variuos UI problems when adding/displaying images with different aspect ratios

