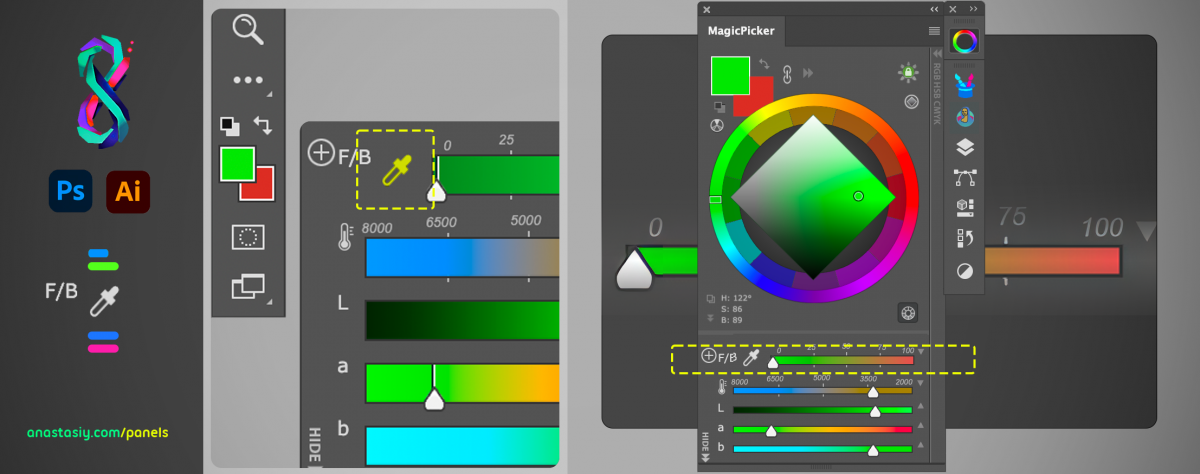
New MagicPicker 9 brings Color History! Draggable between Sliders.
Enter Values on every slider (including Temperature).
Legendary Munsell Color Wheel! Paste colors to MagicPicker (Like “255,255,10” or #fff or even “2.5YR 6/6” or see how “Persian Rose” looks like). There’s more!! Pin HUD to the same place, Vector Opacity, Slight color changes with Ctrl+Shift. Full CC 2023 support. Even more features, faster UI!
Upgrade MagicPicker with Bonus Discount until November 24th!
NEW IN version 9
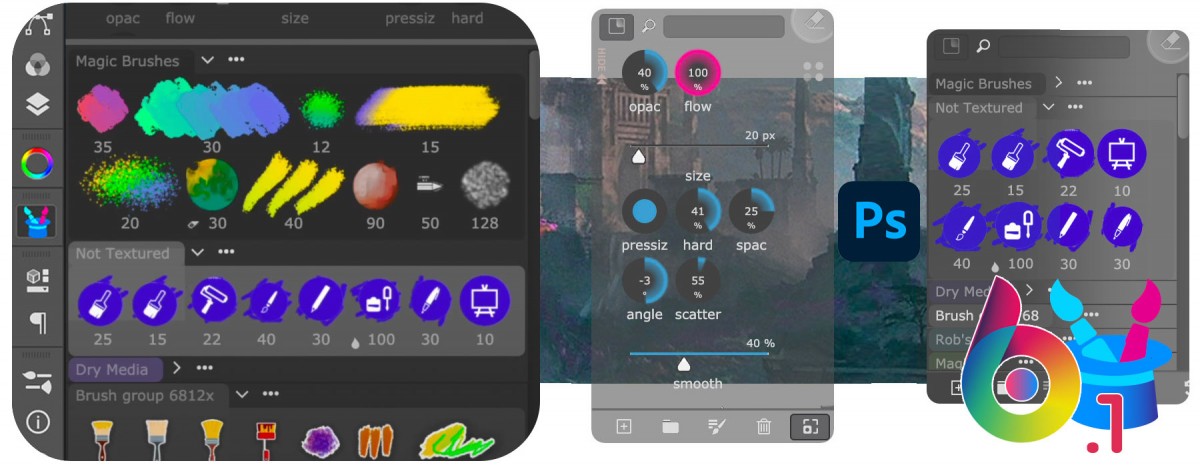
* Improved UI performance! New framework update, for blazing fast clicks, drags and other UI actions
* Full support of new Adobe Photoshop & Illustrator 2023, including Keyboard Shortcuts
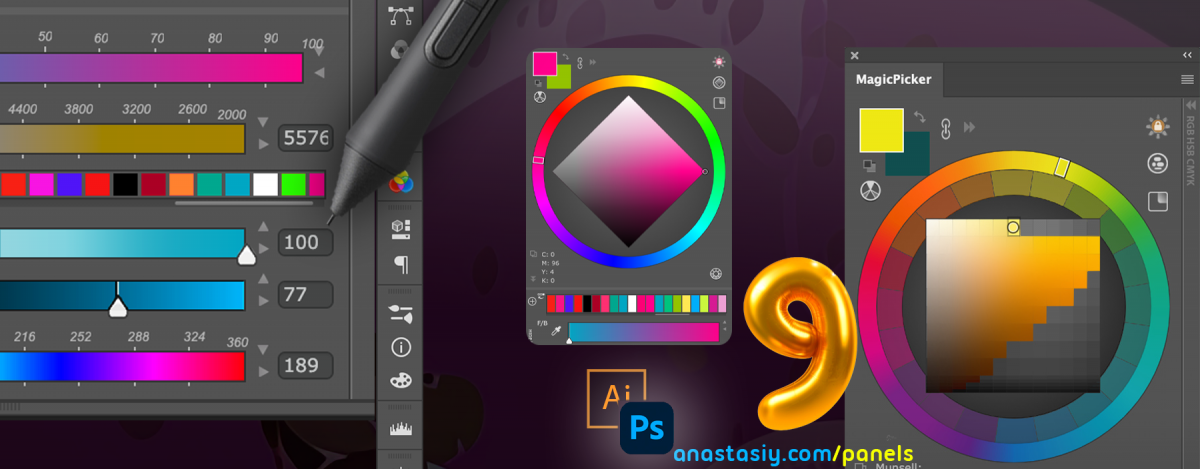
NEW! Enter values directly in the sliders
New switchable value inputs next to every slider (including Temperature, LCh etc)
Hide/Show with a button
Supports HSB, HSL, Lab, Lch/HCL, CMYK, Color Temperature, Gradient between Foreground/Background (Blend),
CIE L*u*v*, Grayscale, RGB
NEW! Have a constant place for the HUD on the screen. Activated from Settings
“Pin HUD to same place”,
When ON keeps HUD show up at the same place on your screen
When OFF, HUD will show up at the cursor position
Doesn’t let the HUD cover your image
NEW! Munsell Color Wheel – industry standard, with human perceived gamut-limiting in mind
Switch it on using Color Wheel Mode button on the top right
Can display Munsell values on the bottom of wheel
Features extended ranges of Red, Blue and Yellow
Paste munsell data into color wheel (decode) using new Color from Clipboard feature
Supports Red Up mode
NEW! Color History as a slider! Scalable, selectable, scrollable.
Add new Color History using the same “+” button that you use to add sliders
Use Color History with any combination of sliders
Preserves color between sessions
NEW! Paste colors from clipboard – have a text and MagicPicker will convert it to a Photoshop foreground/background color
Paste RGB, Hex, HSL, CMYK
Paste colors by name! Like “Green”, “Red”, or even “Electric violet” – see how colors look like!
Use #123456 for hex colors or 255,255,255 for RGB colors
Use hsb(1,2,3) for HSB colors or hsl(10,2,3) for HSL colors
Supports lab, rgb, hsl, hsb, cmyk, xyz, lch, luv – using “luv(value, value, value)” (example)
Use “2.5YR 6.0/6.0” style for Munsell values
Set up “Color from Clipboard” keyboard shortcut for pasting in Settings -> Keyboard Shortcuts
NEW! Make it blueish or make it warmer – use Ctrl+Shift on sliders to move the pointer slightly towards mouse cursor/new color
when you Ctrl+Shift+Click on the sliders
NEW! Change vector opacity!
Works in Illustrator and Photoshop vectors
When vectors are selected and automatic Opacity button appears under colors, click on it and use slider to adjust opacity
of current selection
– Added Munsell Color values to the bottom left corner of the color wheel, with current color values
– Now HUGE (full panel size) alt-click color preview dynamically changes when current color updated in Photoshop
– Streamlined panel update process, there’s no need to look for serial numbers anymore
– Fixed an issue when some buttons didn’t react on mouse hovers – especially Exchange Colors and Forgeround/Background colors
– Fixed a rare issue when in certain configurations with white foreground color when starting MagicPicker it would show up as white with no hues