Transparent HUD! O.M.G.! Variable opacity. On/off Background 🔮 Blurred Glass effect. Nextgen UI! Assign Custom colorful Images to Brushes, Randomize Brush, size, shape on every click, HUGE previews. More features, faster UI!
WHAT’S NEW:
NEW! Preview files before loading
Select one or multiple .ABR files to preview at once
Preview all content of Brushes/Tools and choose which files to actually load – using checkboxes
See what all Tools and Brushes look like in a huge single window
NEW! Custom Images for Tools/Brushes!
Assign any image to a Tool or Brush
Load from .png, .gif, .svg or .jpg files
Use high resolution images and images with transparency, any colors, shades, sizes, etc
Assign a single image to multiple presets with right-click
Create your custom beautiful showcase within groups and collections!
Preview on huge tooltips (see below)
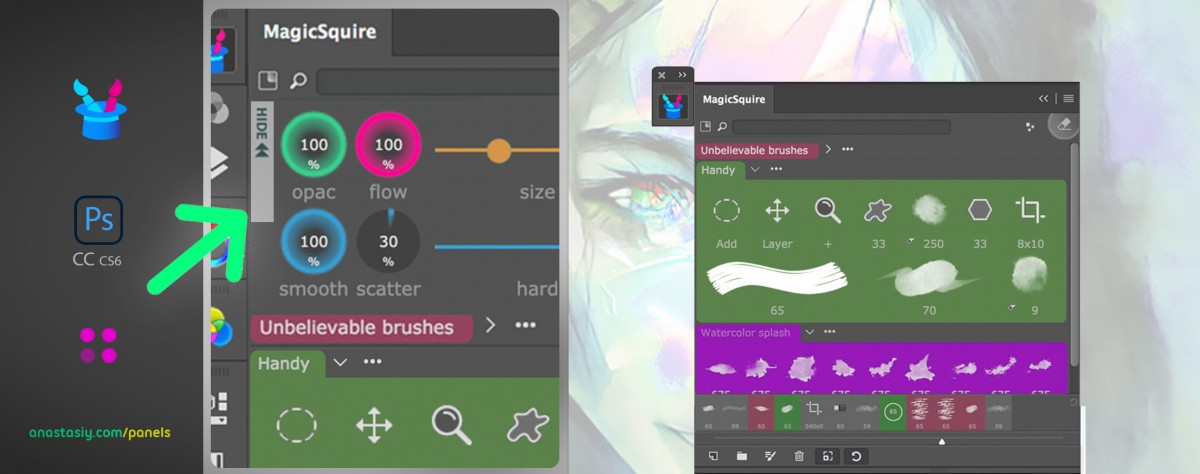
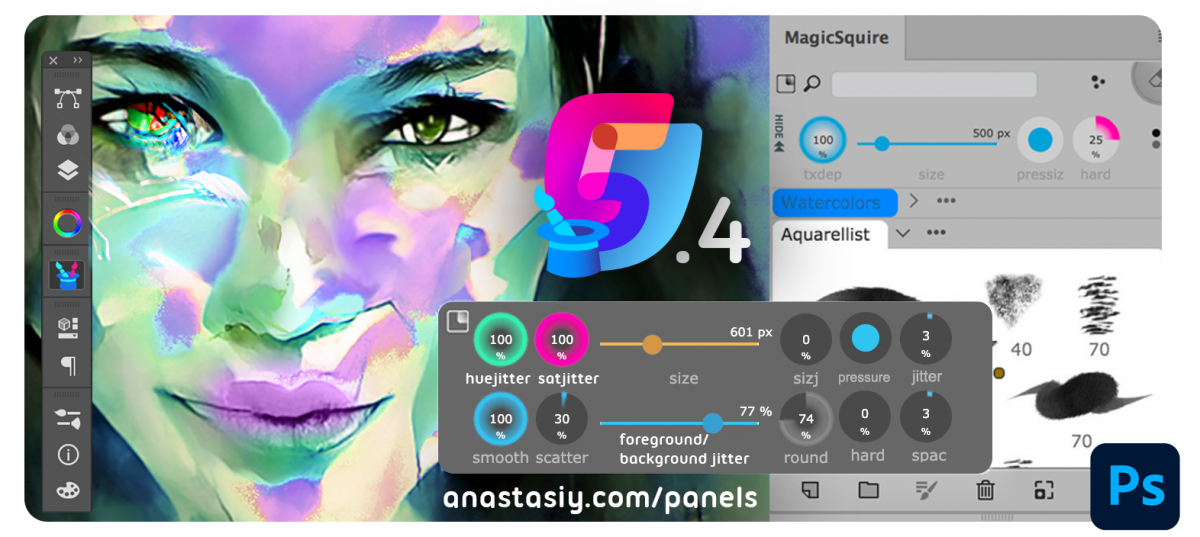
NEW! TRANSPARENT HUD – a new see-through experience! Change from Settings
MagicSquire HUD now can be fully transparent so you could see where you’re working at
Have only Brush Controls or Brushes visible
Transparency can be set in Settings from 0 to 100, dynamically
Activate Blur to blur background under panel
Supports PRO Mode so you could only have info you need visible on the screen
HUD is still resizable in that state
Supports all features of MagicSquire including tags, shortcuts, etc
Pops up under your cursor
NEW! Tool/Brush RANDOMIZER
Have a random brush/tool selected after each Stroke!
Or after clicking a Randomizer button – tune up in Settings
New Setting called “Randomizer selected permanently”
* when it’s On then click on the Randomizer activates it until it unclicked, so
random brushes will choose each time you make a stroke on canvas
* when it’s Off you need to press Randomizer button on the top of the panel
to randomize a brush
Every Tool/Brush is selected from the current group so you can choose group to randomize from
NEW! Displays HUGE tooltip previews for all brush thumbnails
See your presets in a fancy beautiful detail
Supports Custom Images!
NEW! Keyboard Shortcuts for previous/next in Tool History
Easily select previous preset in a click of a button
Or navigate through presets with keyboard shortcuts
NEW! Edit/New Brush dialog now has tooltip explanation for each brush stroke type
– UI speedup! Works much faster using new Photoshop API
– Improved behavior of HUD size, it now should resize properly
– Overall improvement in visual performance when displaying and scaling brushes, opening/closing groups
and dragging/dropping brushes. Speeded up brush selection on large collections.
– New UI framework uses less RAM
– Fixed various issues with Brush Controls, when they slowed down Photoshop or didn’t display values
– Fixed problems between context menu and tooltips
– Improved History rendering
– Improved multiple UI areas and fixed glitches
– Improved messaging and error handling across the panel
– Fixed “Missing presets” message appearing in some scenarios
Upgrade MagicSquire with early discount
Read more about MagicSquire, advanced brush manager and HUD in Photoshop