MagicSquire 6.1 update! Power up your Photoshop brushes. Better UI

WHAT’S NEW:
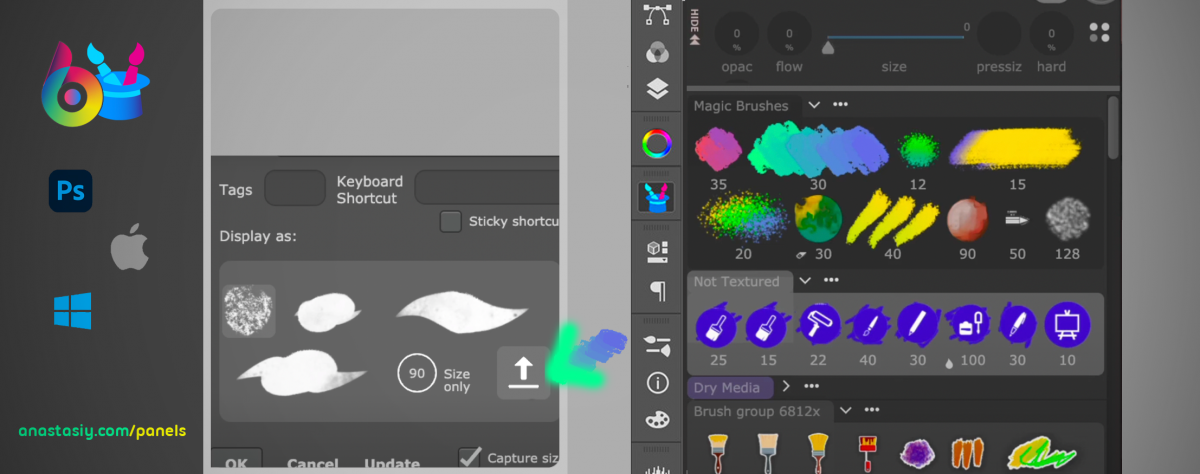
– Fixed a problem when creating a preset with Custom Image as brush tip/stroke – in some cases it didn’t appear
– Removed unused shortcut slots from Keyboard Shortcuts in Settings dialog
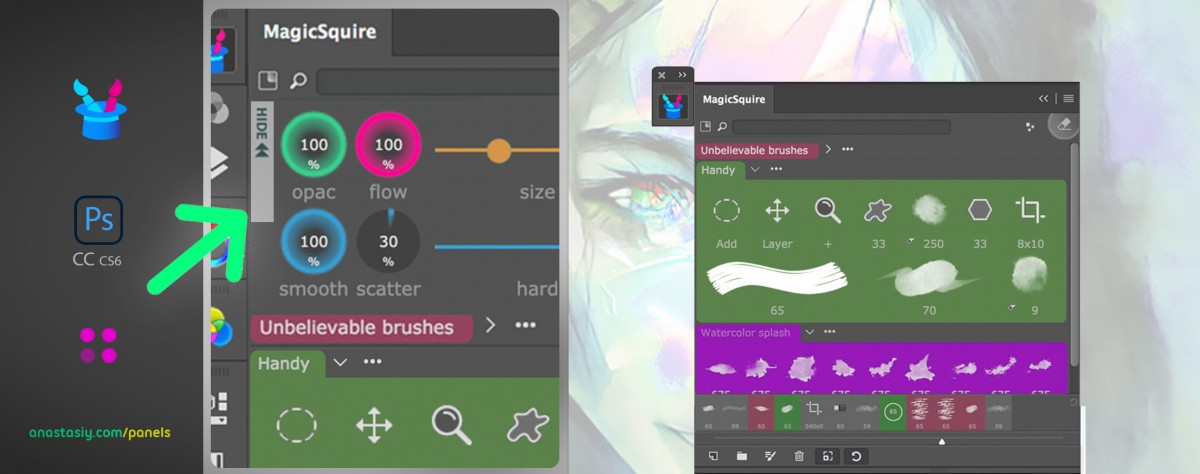
– Fixed problem with selected presets after creating a new empty Group
– When editing a brush always rendered stroke images – fixed
– Fixed a UI problem when editing a preset with square brush tip image
– Fixed issues with making a Group color black
– Fixed a problem when adding Scattering to existing preset using Update button
– Fixed UI issues on Photoshop CS5/CS6

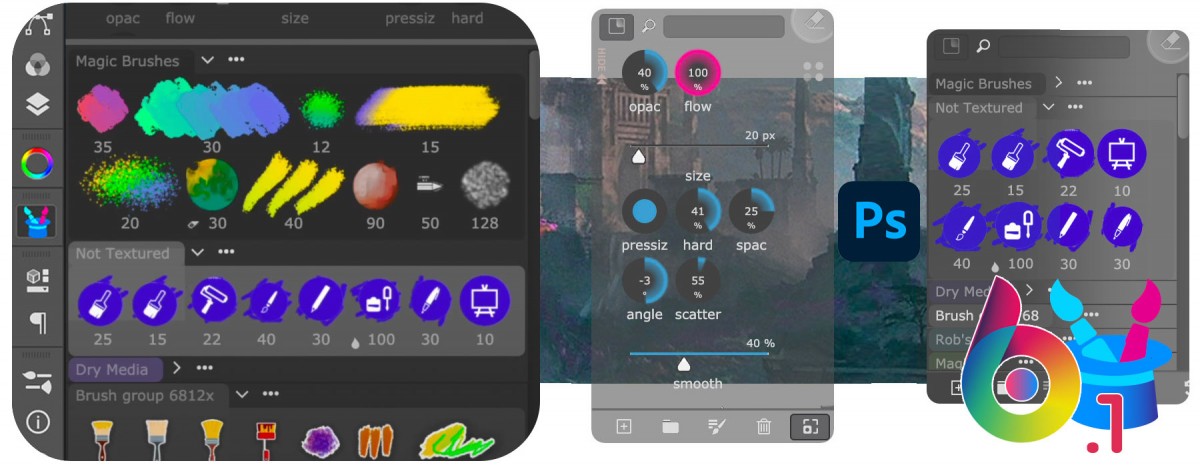
Upgrade MagicSquire to version 6.1

Read more about MagicSquire, advanced Brush and Tool manager and HUD for Adobe Photoshop

Tip#115: Custom Images for Photoshop Brush/Tool Presets in MagicSquire

Here’s how to assign your own 🍕 Custom images to Brush & Tool Presets in MagicSquire 6 for Photoshop

  1. Click the ⬆️ on MagicSquire panel when you’re creating new or editing existing preset.
  2. Select an image.

That’s it! Build a beautiful high-res showcase of your tools. 

MagicSquire is an advanced Brush/Tool Preset Organizer and HUD for Photoshop

Tip#111: Hide/Show new Photoshop Brush Controls in MagicSquire

🧙️ Hide Brush Controls on MagicSquire panel in #Photoshop by clicking the button titled “Hide” on the top left of the panel.

This works great if you only need to organize and access 🟡💜🟩 groups of brushes/tools.

Re-display Brush Controls by clicking the 🎛️ “Show Brush Controls” button on the top.

From series of tutorials for MagicSquire, the pro manager with colored groups for Photoshop brushes

Tip#110: Using MagicPicker Transparent and Crystal HUD modes

Use new MagicPicker’s 🧿Crystal HUD mode or see your fantastic artwork through transparent panel.

  1. Change HUD Opacity in Settings or
  2. Enable background Blur
  3. Adjust HUD transparency 0-100
  4. Quickly call HUD with a shortcut
  5. Resize HUD the way need

From series of tutorials for MagicPicker, advanced Photoshop color wheel panel

Tip#109: Use new combinations of color spaces and sliders in MagicPicker

In MagicPicker 8 you can add any combination of any color spaces under the color wheel. These color spaces are added in the form of sliders that you can interact with and adjust colors.

Have HSB/CMYK/Lab combination, or HRB combination, or use new L*c*h color space that allows you to keep Hue in the same perceived brightness (same way as Tone Lock works). etc!

1) Click on the “Add Color Space” “+” button near sliders on the bottom
2) Choose any color space to add: Lab, F/B Gradient, HSL, L*c*h, CMYK, Grayscale, CIE Luv, HSB, RGB, Temperature
3) After adding color sliders you can remove any of them by dragging by its label
4) Rearrange sliders by dragging

MagicSquire 5.0 video tutorial: Brush Controls, mass-tagging, more!

The video tutorial on all new features of MagicSquire, Photoshop brush organizer plugin is out!

Upgrade MagicSquire here

Read more about MagicSquire, Photoshop brush organizer plugin


MixColors 4.1 update! Better palette extraction from photos, better UI

WHAT’S NEW:
– Improved Color Palette extraction from complex photos
– Better grouping of frequent Collections of Groups
– More auto Color Names now supported for more colors
– New design now even more fine tuned
– Improved Chinese and Spanish localization
– All available on Photoshop CS5, CS6, CC, CC2015, 2017, 2018, 2019, 2020 and 2021+

Tip#106: Bring multiple objects to same palette with MagicTints

Select multiple layers

Select multiple pixel layers and then click “Apply” on MagicTints panel. That’s it! MagicTints will bring all selected objects to the same palette, from the Color Reference list. All at once.

  • You can choose specific colors or use any image as a target color reference. Works very accurately, transfers colors and contrast immediately.
  • You can also assign Keyboard Shortcut to that operation

Works in Photoshop, Illustrator, InDesign.

Or you can export LUT and use on any photo video in Affinity Photo, Lightroom, Premiere Pro, AfterEffects, Final Cut or even in 3D software like Unity, Blender or Unreal Engine.

MagicTints is also available as a standalone app on macOS or Windows.

From series of tutorials for MagicTints, 1-click accurate color matching

Anastasiy’s Extension Manager 3.7 update!

Update if you’re on Creative Cloud 2021. It’s free for all Art community! Install, Remove, Update, Manage any Adobe extensions easily! Anastasiy’s Extension Manager v3.7

WHAT’S NEW:
– Improved compatibility with all latest CC 2021 updates on Windows and macOS
– Dark/Light OS color mode support on Windows and macOS
– Updated File -> Reset extension list to support Apple M1 and recent CC 2021
– Better support for https/ssl when downloading updates
– Improved UI on macOS Big Sur
– All made by your feedback! Please keep it coming!

Free Anastasiy’s Extension Manager & Installer for .zxp Adobe extensions

Tip#104: Match elements from different photos 🍭 in one click

1) Bring backdrop into MagicTints as color reference by clicking a Screen Shot 2021-07-20 at 9.00.52 PM down arrow on the toolbar
2) Select another object (image, layer, group of images) and click “Apply”

The elements will precisely color match (keeping contrast etc.) Apply to illustrations, 3D renders, photos. Works in Photoshop, Illustrator, InDesign plugin.
Also works in a MagicTints Desktop App on macOS and Windows – just use transparent PNGs for objects.

3)* You can use the same technique in video software like AfterEffects, Premiere or Final Cut Pro – by applying LUT exported from MagicTints

From series of tutorials for MagicTints, 1-click precise color matching app